
Background
Inspiration and Value
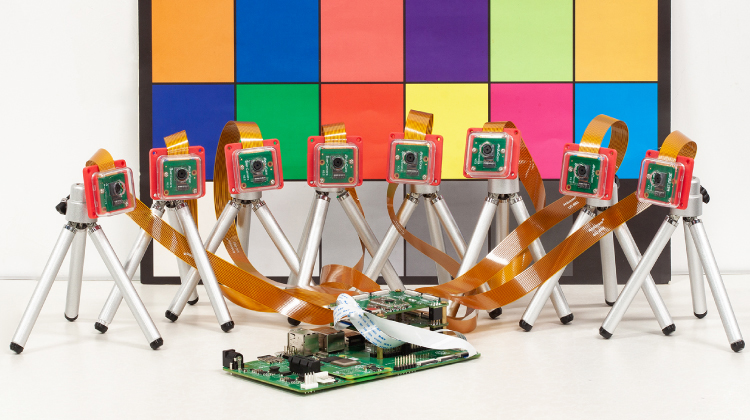
Is running eight cameras simultaneously on one Raspberry Pi CM4 hard?
Well, the simple answer is ‘no’, as long as you’ve got the Arducam Camarray Synchronized quad HAT in hand. To complete the task, all you need to prepare is just two HATs with 4 cameras for each. And we already bundle them together for you, a Kit ready to start.

The direct motive for this tutorial came from one of our fan users who recently shared with us his try. Generally speaking, however, demands of multi-cam applications always exist, such as 3D scanners, drone cameras, IoT cameras, stereo robot vision, wildlife cameras, 360-degree view surveillance, face/object detection, live-streaming, and so on.
Actually, believe it or not, speaking of multiple cameras working literally ‘at the same time’* on one single RPi, Arducam hardware is still the only capable solution so far. To achieve such an accomplishment today, we have made three substantial breakthroughs over the years: multi-cam adapter board, synchronized stereo camera HAT, and Camarray.
*at the same time
– For a single HAT, CAM0 & CAM1 are fully synchronous, so it is with CAM2 & CAM3; while there is one frame delay between CAM0/1 & CAM2/3.
– For the 8 cam application mentioned in this tutorial, two HATs are NOT fully synchronous and the time delay depends on actual multiple influential factors
Iteration of Arducam Multiple Camera Solutions
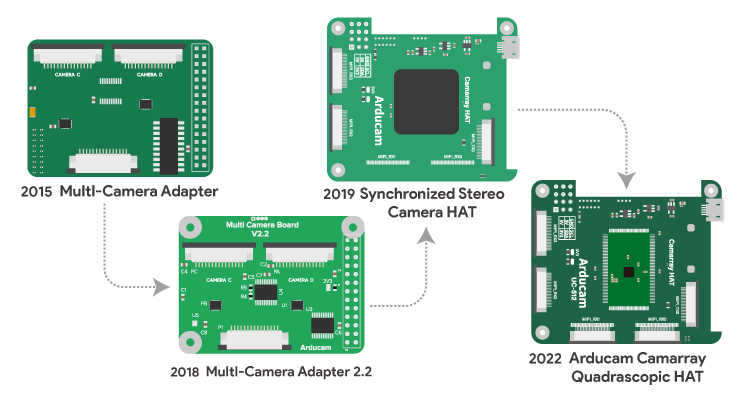
Phase1
Arducam Multi-cam adapter board met the primary demands of more than one camera shooting from different angles of view, enabling users to connect up to 4 cameras to a single Pi board.
However, it only activates one camera at a time, and you have to switch between them. Advanced Raspberry Pi users demand simultaneous working so they want a real stereo camera for Raspberry Pi 3, 4, and other standard Pi boards. It was an unresolved problem limited by the RPI’s hardware design because the standard Raspberry Pi models only have one camera port. An alternative is to use network-based synchronization, but you still have to use one Raspberry Pi board for each camera setup, and the capture process is still not at the exact same time which will introduce the movement or artefacts between multiple images.
Phase2
Arducam then released a stereo camera HAT for Raspberry Pi which allows you to connect two 5MP OV5647 or two 8MP IMX219 Pi cameras to a single standard Pi board and takes images or video at the same time. More importantly, this binocular solution makes both cameras fully synchronized.
Phase3
Then came the Camarray. Camarray is Arducam’s latest multi-camera solutions for Raspberry Pi, Jetson Nano, Xavier NX and more, consisting of both hardware and software solutions. The core hardware solution breaks the limits of physical camera connectors and allows for connecting up to 4 same MIPI cameras. The software solution makes it possible to completely display and capture video feeds from all the cameras connected, or even support image sensors that are not natively supported by the official drivers.
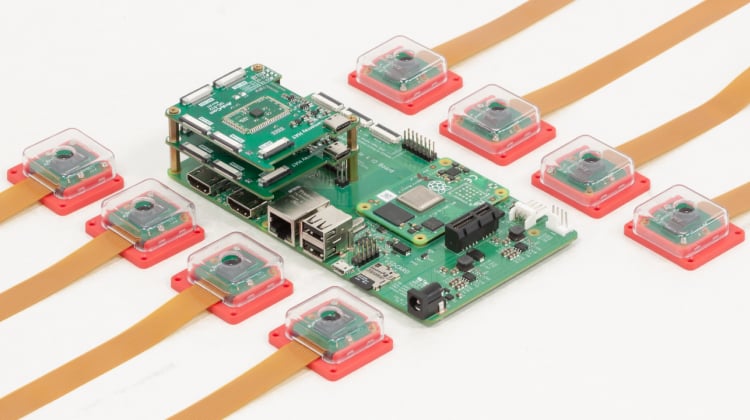
The leading actor today – the Arducam quad camera bundle kit – represents the most updated Camarray solutions that further pushes the multi-camera limits and doubles the interfacing capabilities to allow 4 synchronized MIPI camera modules to be interfaced to a single MIPI CSI-2 slot.
Let’s go
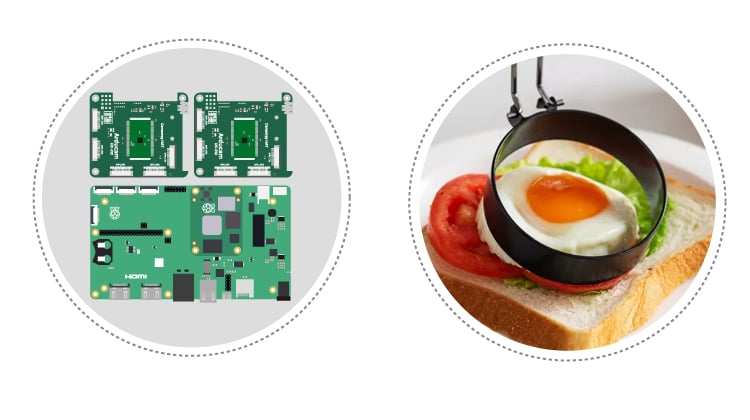
Now, let’s get started with this easy-as-frying-an-egg job.
Ingredients
Have a look at all that you need for the dish.
Hardware
- 1 x Raspberry Pi Compute Module 4
- 1 x Carrier board (Raspberry Pi CM4 IO board highly recommended for a stable performance)
- 2 x Arducam 8MP Quadrascopic Camera Bundle Kit. Each of the Kit includes:
- 1 x Arducam Camarray HAT
- 4 x 8MP IMX219 Camera
- 4 x 15cm 15-22pin Camera FPC Cable
- 1 x 30cm 15-22pin Camera FPC Cable
- 1 x 7cm 15-22pin Camera FPC Cable
- 1 x Screw Pack
Environment
- ARM (Raspberry Pi CM4)
- Raspberry OS: Bullseye
Recipe
Now let’s move on to how to ‘cook’.
Connection and Power Supply
- Connect each of the Camarray HAT (MIPI TX) to the IO board (one to CAM0, the other to CAM1)
- Connect the RPi CM4 IO board to your screen
- Power on the two Arducam Camarray HATs
To electrify the HATs, you can either
- Use a Type C power cable, or
- Connect to the Pi simply by capping onto its GPIO (5V & GND) or using a piece of the 2-pin power cable
- Power on the RPi CM4 IO board
Configuration
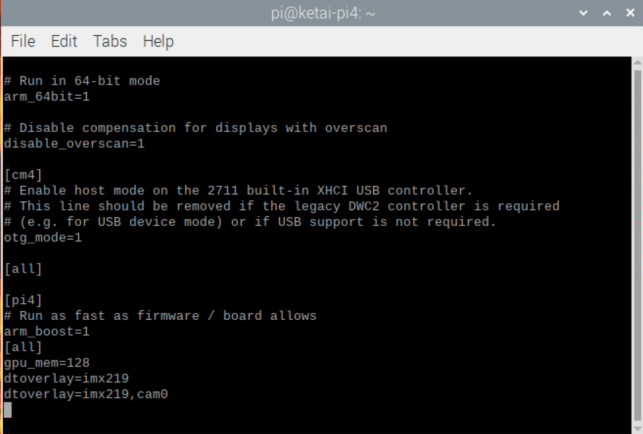
sudo vi /boot/config.txt
Modify the config file by adding the below
dtoverlay=imx219
dtoverlay=imx219,cam0
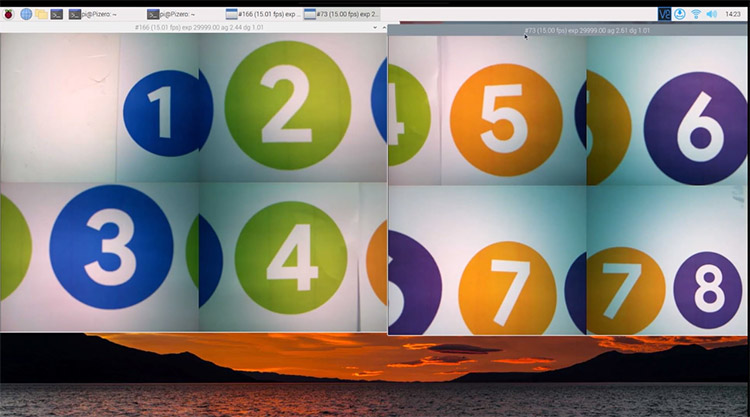
Running Multiple Cameras
Open two terminals respectively.
For terminal 1
libcamera-still -t 0 --camera 0
For terminal 2
libcamera-still -t 0 --camera 1
See the full demo here.


Have you ever thought of making a polarize imager combining multiple cameras each with a polarizing film rotated at a different angle?