
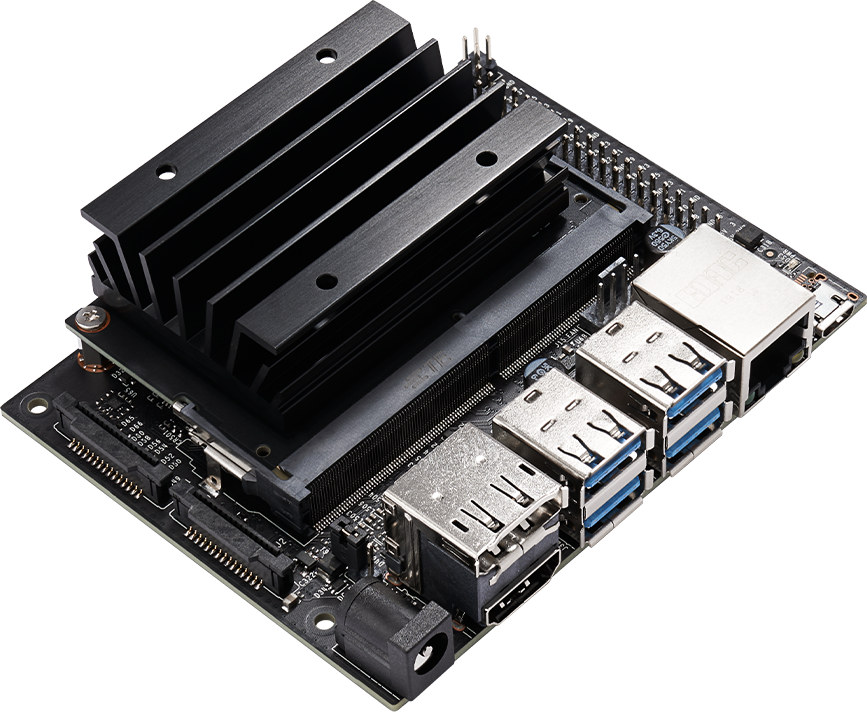
The latest Jetson Nano revision offers several hardware modifications, including an extra camera slot, as we’ve mentioned in our breakdown of the B01 carrier board changes. This change may imply that the NVIDIA embedded group is as concerned as Arducam with the user’s urgent need for a real Jetson Nano stereo camera solution.
Arducam is specialized in multi-camera solutions of popular embedded systems, and we’ve even made it possible for synchronized dual cameras on the Nano before the official support. Therefore, we want to offer you more insights into the Jetson Nano stereo camera and the synchronization issues.
Two ways to launch both cameras with the new Jetson Nano
First up, there are some questions anyone must face when they enter the Jetson Nano stereo camera realm: How to launch both cameras? How is it different from the previous commands? Those camera slots on the B01 carrier board are identical in electronics specs and software functionalities. After you plug both cameras into the slots, they will be emulated in the /dev directory as video0 and video1 devices while booting up. Here are two ways to use those two video devices.
Open with the V4L2 driver
The first and straightforward way to launch both cameras with the V4L2 camera driver framework and APIs. If you open the cameras this way, each camera will be opened and initialized independently.
Open with NVIDIA camera software
Another way is to use NVIDIA proprietary camera software architecture and APIs like libargus and nvarguscamerasrc. You can read further about it on this NVIDIA doc page.
Example to launch the camera using Nvidia camera tool, the sensor-id parameter to identify which camera to open.
gst-launch-1.0 nvarguscamerasrc sensor-id=0 ! ‘video/x-raw(memory:NVMM),width=3820, height=2464, framerate=21/1, format=NV12’ ! nvvidconv flip-method=0 ! ‘video/x-raw,width=960, height=616’ ! nvvidconv ! nvegltransform ! nveglglessink -e
And if you want to open two cameras at the same time, try this example command:
gst-launch-1.0 nvarguscamerasrc sensor-id=0 ! ‘video/x-raw(memory:NVMM),width=1920,height=1080’ ! nvvidconv ! xvimagesink sync=false & gst-launch-1.0 nvarguscamerasrc sensor-id=1 ! ‘video/x-raw(memory:NVMM),width=1920,height=1080,’ ! nvvidconv ! xvimagesink sync=false
How to sync the two cameras in the Jetson Nano way and the Arducam way
Unlike the Raspberry Pi’s mmal API, there is a 3d mode parameter to open two cameras side by side. Nvidia provides a software approach, known as “syncSensor” sample. In this example of using multiple sensors per single session, it’ll duplicate a single capture request to both cameras.
However, the capture results should only be close enough. After a closer look into the new B01 carrier board of the Jetson Nano, we find that it just adds an extra 15-pin MIPI CSI-2 camera slot from the older revision, with barely any major changes. That’s not a 100% guarantee for perfect synchronization on rolling shutter cameras like IMX219 that are natively supported by the camera driver.
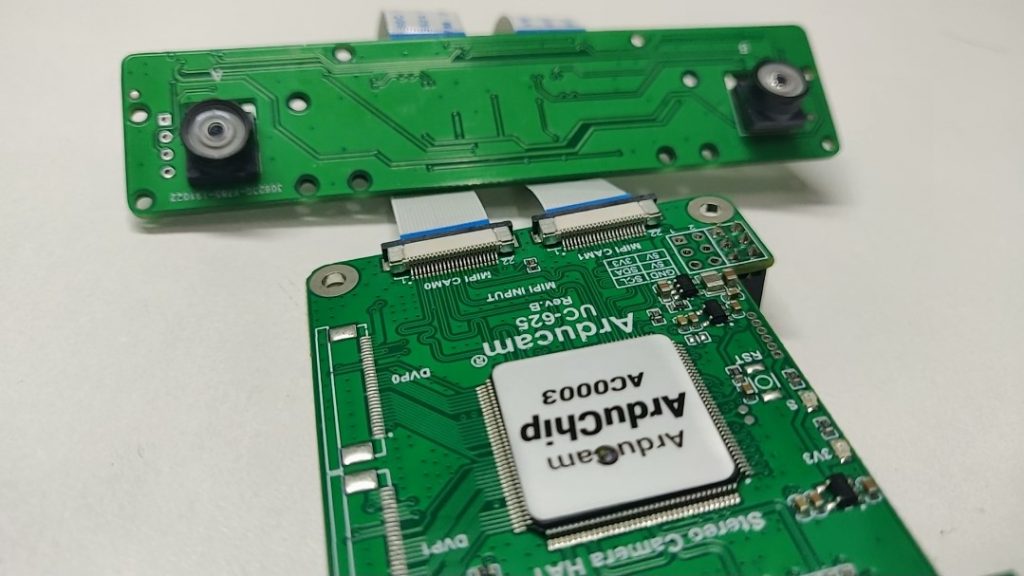
Arducam, on the other hand, our stereo camera solution promises the camera synchronization through hardware-level designs by clock sharing and using I2C broadcasting. That’s how our synchronizing solution is fundamentally different from the official one, and we are confident that it can meet a much stricter requirement of synchronized stereo cameras with any kind of image sensors.
Integration starting point – a key factor in synchronization
Before we dive into the explanation, let’s firstly make a conclusion: Even if you are running the camera using the official stereo camera demo code, the two cameras on the Jetson Nano are not fully synchronized, because the starting points of their integration are not exactly at the same time.

So, what is integration? We can compare the image capturing process of a camera sensor to filling a bucket with running water. How do you fill the bucket? You open the tap and wait while the running water is pouring into it, and when you’ve got the amount you want, you turn off the tap and move the bucket away.
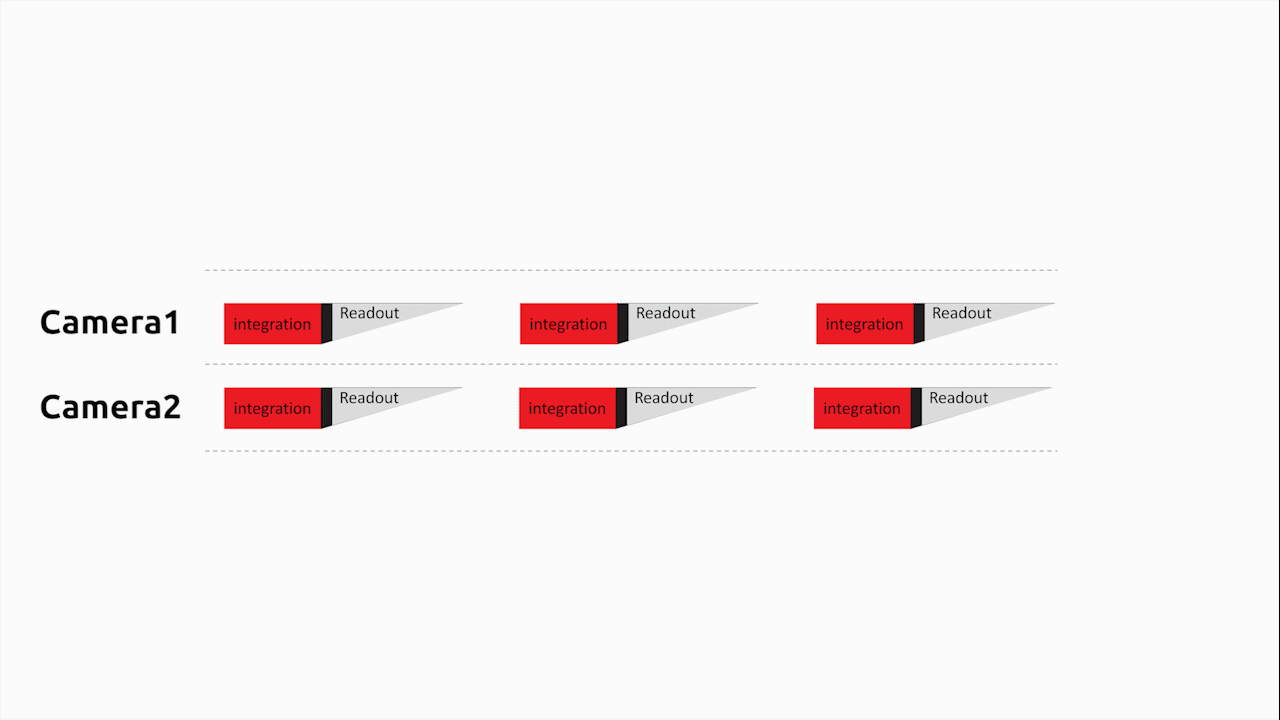
The image sensor works similarly, just with the photons pouring into the CMOS. Therefore, the process of integration is like the process of water filling, it starts when you open the tap and stops when you turn it off. On the other hand, the process of moving the bucket away could be compared to the readout of the image data.
True sync stereo vision: how Arducam approaches the synchronization problem
If we want to make the two cameras fully synchronized, we need to make them start integration at the same time and read out the image data at the same time. Since the Jetson Nano does not allow the two cameras to be started exactly at the same time with the current camera driver, and the clock of those two cameras are not at the perfect same frequency, the camera timing will be drifted over time, which will further cause the exposure time to be drifted over time.
The solution from Arducam is clock sharing and I2C broadcasting. Clock sharing promises to get rid of timing drifting overtime, and I2C broadcasting promises that the camera output timing operates exactly at the same time, so forth the integration start point. Using these two techniques, we can make two cameras fully synchronized at minimum cost in terms of the software driver development and hardware complexity.
Test and measure the camera synchronization status with oscilloscope
To help us better observe whether the cameras are synchronized or not, we need the help of an oscilloscope. We can measure the output signal from each camera module and see what is happening on its display. If the cameras are fully synchronized, each camera will be displaying the same graph, relatively static. If not, you can see clear differences.
We’ve made a video showing how to do that, and you can see clearly on the video that the two cameras on the Jetson Nano are not strictly synchronized, while the Arducam stereo camera HAT solution is.
Global shutter camera with external trigger helps synchronization
Since discussed the term of integration time above, there is an alternative way to do a synchronized capture on Jetson Nano B01 by using global shutter cameras which supports external trigger. Although these two cameras are not fully synchronized in streaming mode, but once they are set to external trigger mode, the integration point is at the same time and readout time is fairly close. Another Arducam project Jetvariety demonstrates how to use external trigger cameras on Jetson Nano.
We Plan to Connect Up to 8 Synced Camera Modules to The Jetson Nano B01 Kit
The Arducam Stereo Camera HAT solution does not aim to become a replacement to the Jetson Nano stereo camera solution. Instead, we bring more opportunities to it. Our solution can add synchronized stereo MIPI camera solutions by externally doubling the number of the camera slot, and it’s not limited to certain type of cameras, any revision of Jetson Nano or even the Jetson platform.
Since we’ve made the stereo camera possible when the Jetson Nano only offers a single camera slot, we are heading toward even more synchronized cameras. Currently on the B01 revision, you can run two pairs of synchronized camera modules, and that is four in total, with our Arducam stereo camera HAT.
What’s next? We have finished the prototyping of our Camarray HAT that doubles the current camera aggregating and brings quadruple synchronized cameras from a single original MIPI camera slot. Soon we will be connecting 8 synchronized camera modules to the latest Jetson Nano B01 kit, so stay tuned for more surprises from Arducam.


Any news on the 8 synchronized cameras?
Thanks!
Do you have/could you have this sync solution using the imx477 module? (m12 mount).
The B01 should handle 2 of these modules. 4 would be awesome, but i think the bandwidth for 12mp 30fps x4 is too much for a single nano
The last video talks about using an arduino for external trigger. Do you have designs for this available? How fast a mircoC (arduino) is required? Could the jetson provide the trigger itself?