The Difference Between A Compute Module and A Raspberry Pi
Most of us are familiar with the standard Raspberry Pi models, such as the Raspberry Pi 2, 3, 3B+, 4. Aside from these models for the consumer end, there is another lineup of the Raspberry Pi family intended for industrial application, and that’s the Raspberry Pi Compute Module.
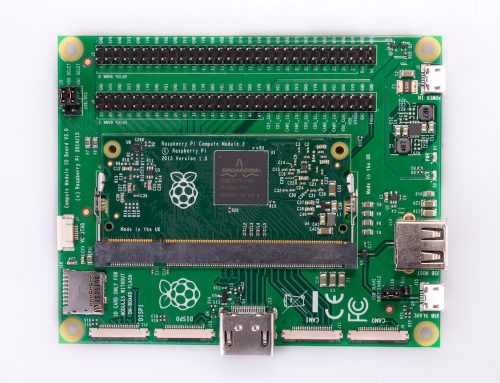
A Raspberry Pi Compute module shares the same SoC with its standard Raspberry Pi model. For example, the Compute Module 3 (CM3) has the same BCM2837 processor and 1GB RAM as the Raspberry Pi 3, just with a more flexible form factor. The compute module takes the form of an SoM (System on a Module) and connects to a carrier board with a standard DDR2 SODIMM connector for I/O peripherals. Besides, you don’t need an SD card for the Compute Module because it comes with an optional 4GB eMMC Flash device soldered on board for the storage.
However, as a major Pi camera manufacturer, what we care about is the extra camera features that the Compute Module can bring. Different from the standard Raspberry Pi models, the compute module 3 brings out 2 native camera interfaces to connect to 2 Pi cameras simultaneously. That means we can achieve many applications that are impossible on standard Raspberry Pi models.
More than Stereo Vision with CM3
After we release the stereo camera hat for Raspberry Pi, we started to think about further possibilities of multi-camera solutions on the Raspberry Pi ecosystem. Now that synchronized stereo camera is coming to every Raspberry Pi, how can we synchronize even more cameras?
It’s time to give the Raspberry Pi Compute Module a try. The Arducam stereo camera HAT can disguise the dual-camera setup as one camera module in one camera slot, and the Raspberry Pi Compute Modules offers two camera slots.
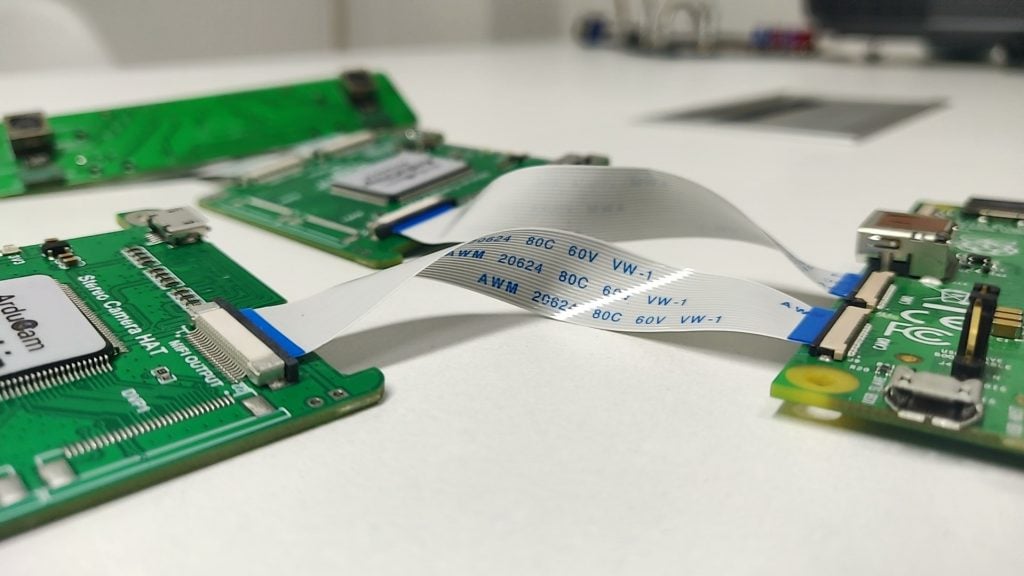
If we can connect two cameras on the CM3, we can connect two Arducam stereo camera HATs. As each Arducam stereo camera HAT connects to 2 camera modules, it’s possible to get 4 cameras running on the Compute Module.
4 MIPI Cameras Capturing Videos at the Same Time on Raspbian
Arducam has had a multi-camera adapter that can display the images of 4 cameras on the Raspberry Pi. However, the 4 cameras are running sequentially with poor frame rates. Now it’s time for a new breakthrough: we’ve managed to get 4 MIPI camera up and running on the Raspbian, capturing videos at the same time.
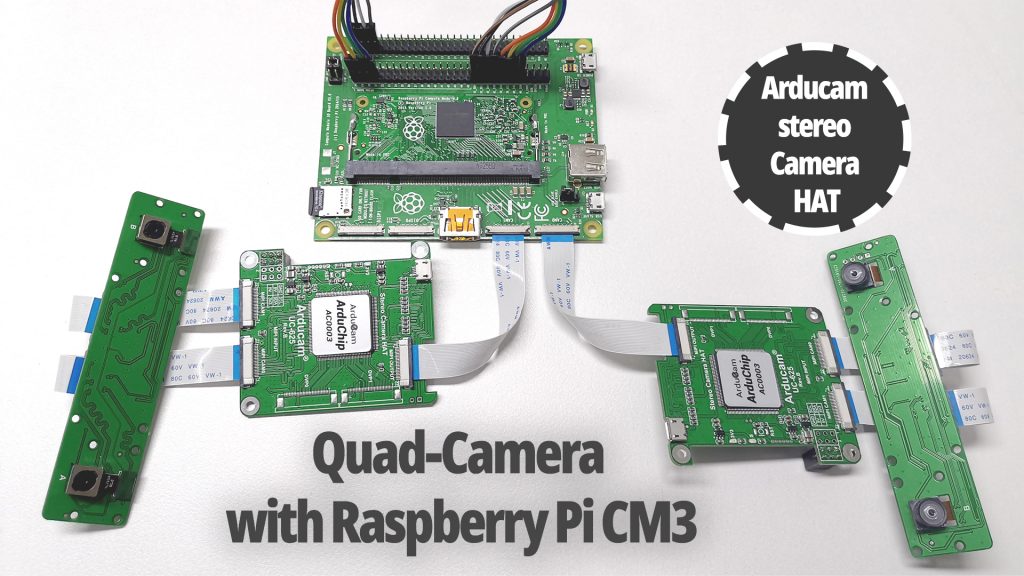
It’s not easy to display the images of 4 camera modules, and we need extra hardware and software to achieve that. Aside from the Raspberry Pi Compute Module, we need two Arducam Stereo Camera HATs and two Arducam Stereo Camera Boards.
We could go with 4 synchronized camera modules with the same image sensor or 2 internally synchronized stereo boards with different image sensors. To make it more interesting, we have taken the latter option and used two different kinds of camera modules for the stereo camera board. One is a Raspberry Pi camera V1.3 style OV5647 stereo camera board, the other is an OV9281 monochrome global shutter stereo camera board. The two OV5647 cameras will be synchronized with each other, so do the two OV9821 camera modules.
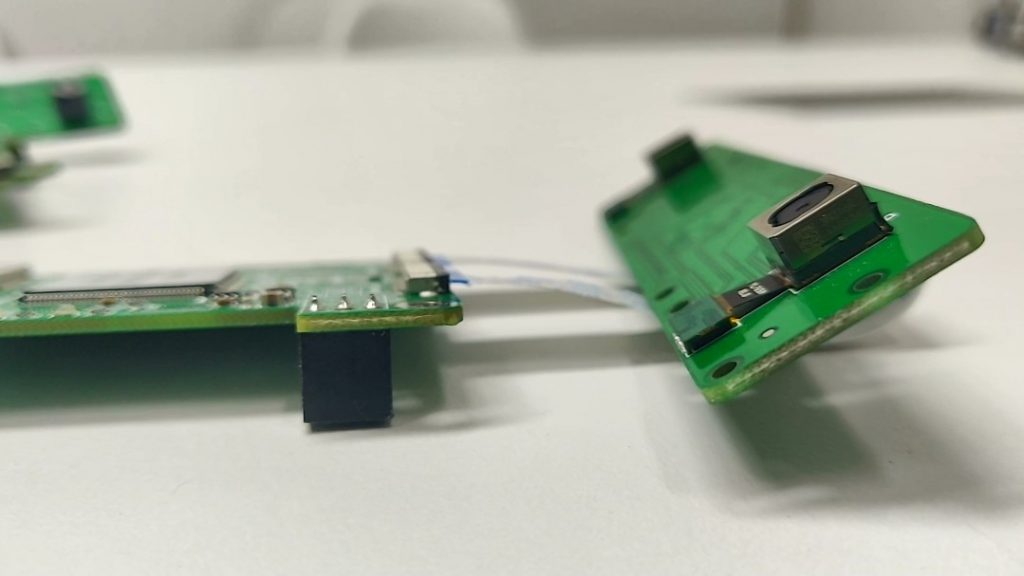

OV5647 Stereo Board 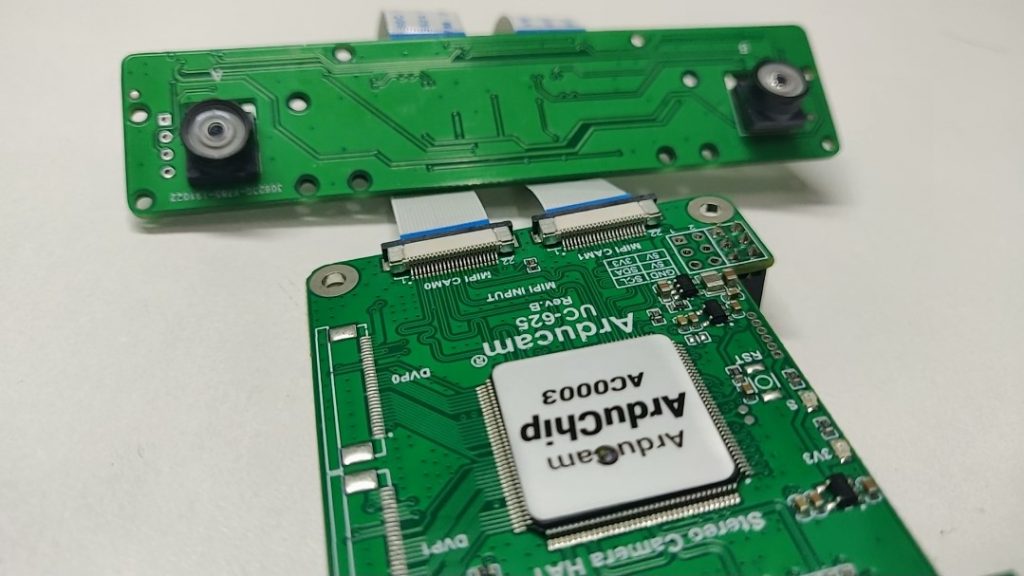
OV9281 Mono Global Shutter
The software that keeps the setup work and running is the Arducam proprietary userland MIPI camera driver. It can display full combined images of the stereo vision, and lets you use MIPI camera modules with different image sensors on the Raspberry Pi, both rolling and global shutter, up to 18MP.
Here is a video demo that shows how we can get 4 camera modules capturing videos at the same time on a Raspberry Pi Compute Module.
Why 4 cameras or even more?
When we released the Arducam stereo camera HAT, we have given a brief introduction to what could be achieved in a dual-camera setup. In one demo, we’ve used the Arducam Stereo camera HAT to draw a depth map that tells how far an object is from the camera. In the other, we’ve used 2 fisheye lenses to build a Raspberry Pi 3D camera setup for panoramic photos and videos.
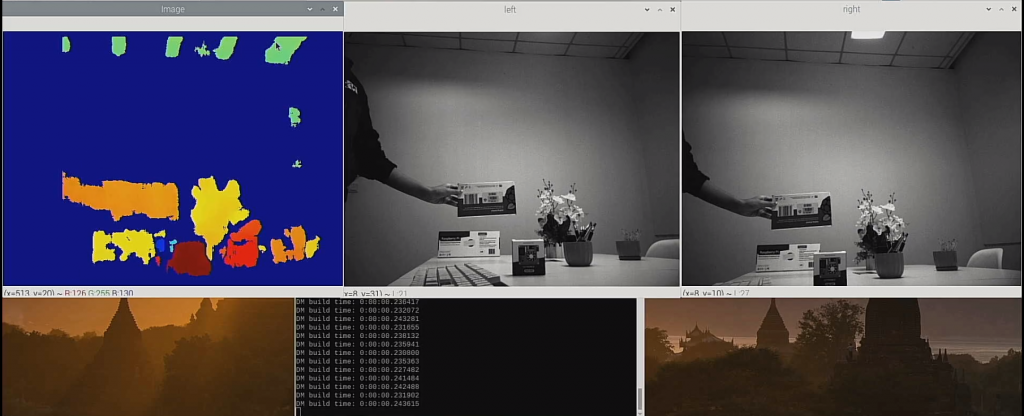

Depth Map 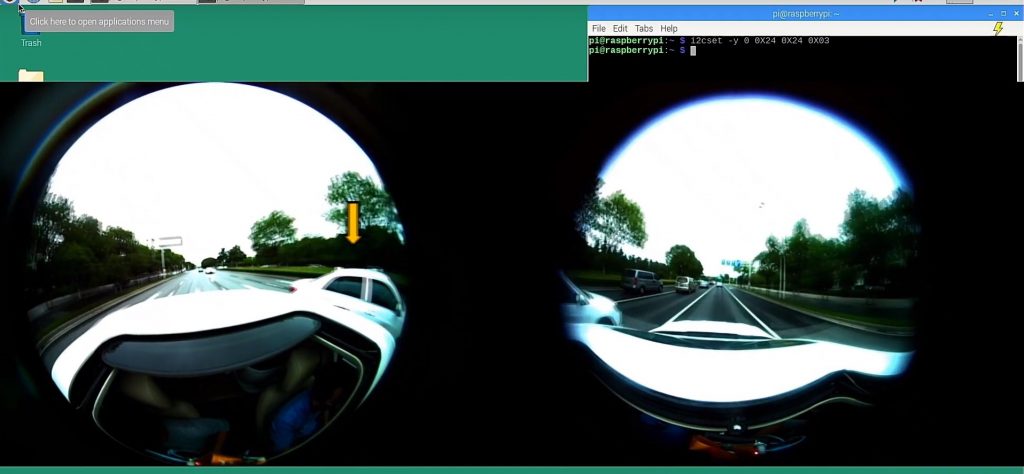

360 Video
If the dual-cam setup seems promising to achieve so many applications, what’s the point of adding even more cameras in an embedded setup?
Let’s take the Virtual Reality (VR) application for example. VR devices need multiple cameras to track multiple objects, including the headset and additional controllers. Previously, these multiple cameras are connected to a PC, leaving extra cables and cords to make the whole setup less portable.
Therefore, the multi-camera setup is later embedded in the headset for an immersive experience without external tracking cameras. The Oculus Rift S uses four wide-angle cameras located on each corner of the headset to track the headset spatially.
In the next-generation prototype of Facebook’s VR headset, the eye-tracking features will be added for even fancier features such as varifocal displays, which will require even more cameras embedded in the headset.
Bringing Multiple Cameras to the Next Level
For a long time, Arducam has tried hard to push the boundary of the multi-camera solution in the Raspberry Pi ecosystem. We started with camera multiplexers that can switch between multiple camera modules quickly, but now the Arducam Stereo camera HAT and the Arducam MIPI camera project is bringing multiple cameras on the Raspberry Pi to the next level.
In short, we believe in making the impossible possible and making the hard easy. It was impossible to use synchronized dual cameras on the standard Raspberry Pi cameras, but now, Arducam stereo camera HAT is bringing the stereo vision to every Pi. Aside from that, you are not limited to the V1 OV5647 and V2 IMX219 camera modules. With the Arducam MIPI camera driver, it’s becoming possible to get the stereo vision from every MIPI camera on every Raspberry Pi.
With more camera applications available on the Raspberry Pi, we believe that more potential of the Raspberry Pi will be unleashed, and Arducam is happy to be a part of this process.
What about the Raspberry Pi Compute Module 4?
Although being a little bit different from the Raspberry Pi CM3, the Raspberry Pi CM4 is basically the same to use for this application. The only major difference, however, would be the jumper wiring. The CM4 now requires a different jumper wiring method than the previous version – there are not that much GPIO pins anyway.


I love what you are doing! This is very exciting.
Thanks!
Would this be worthwhile doing if lets say synced video was not not needed at all? What is best set up combination for taking 4 syncd photographs with 4 camera modules? So glad I found your site!
Hi, what are the possible solutions to take 4 still photographs simultaneously from 4 camera modules? This is something I require for a highspeed camera project.
We will be releasing a HAT that syncs 4 camera modules very soon!
Hello, I’m very interested on the 4 cameras sync HAT. Is there any expected release date?
Thanks in advance!
Hello I’m also interested on the 4 cameras hat. Is there any expected release time?
Thanks!!
Hello, we are still working on it, you can subscribe to our Arducam Youtube Channel and we will upload a video when it’s released.
Hello,
Your next Hat for 4 camera modules will work on Raspberry Pi 3B+ ?
Yes, since it’s a called hat it should be working with every Pi that can accommodate a HAT.