Complex High Definition Camera on Simple Microcontroller and Interface, only possible Arducam.
What is Arducam Arduino Camera
The Arduino project began in 2005 as a tool for students in Italy to use in electronics development courses aimed at providing students with an easy to use platform that integrates both hardware and software. Arduino is now becoming an industry-wide standard for integrated development environments and compilers for microcontrollers.
Applications like IoT, wearable, 3D printing and robotics have already been built using the Arduino solution. The only thing still required is camera applications.
Arducam invented the world’s first high-resolution SPI camera for Arduino in 2012. Since then, ArduCam SPI cameras have been filling the camera needs that were previously impossible to cover with the Arduino board’s native camera support.
These SPI cameras are suitable for a broad range of devices, not just Arduinos, but can also be utilized on other devices that have the SPI and I2C connectors.
Why Cameras Are Hard for Arduino
To explain why there has never been real camera support for Arduino before, it would be best to first describe camera support at a high level from both hardware and software perspectives.
Hardware side – Camera Interface and RAM
Arduino boards, of which the most mainstream and popular are UNO, MEGA, and Nano, are based on the Atmel ATMega328p, 1280, and 2560 processors. Later, the 32-bit Arduino Due uses the Atmel SAM3X8E.
None of these microcontrollers have an adequate camera port to convey high-speed camera video signals, and neither do they have enough RAM onboard to hold an entire image.
Software Side – Camera Driver
On the other hand, even if there is a dedicated camera port on Arduino, you still need the proper camera driver to make it work, because different image sensors require different camera drivers, and writing such a driver is not an easy task for those developers who just want to take the camera for granted. What’s more, it is not that easy to get support from an image sensor vendor for a datasheet and register settings to write a camera driver.
How Does Arducam Make It Possible
How to connect a camera with a proper interface
Since SPI and I2C are the most popular interfaces on all of those MCUs, Arducam is looking into using SPI for image data acquisition and I2C for configuring the image sensor register settings.
The SPI interface is the fastest of low-speed peripherals, compared to other 1-Wire, I2C, UART, and I2S interfaces on the MCU. It is a bus style interface with one master and several slave devices connected to the same bus with individual chip-select signals.
The Arducam camera’s SPI speed is designed to be 4Mbps~8Mbps for compatibility with both 5V and 3.3V systems on different Arduino MCUs or even other ARM processors because the 5V<->3.3V level shifter timing will cause communication error running at high speed.
Therefore, the recommended speed is 4Mbps~8Mbps. Faster SPI speed is also possible by contacting Arducam for customization.
Deal with the video signal and Frame Buffer
Arducam also developed a co-processor, referred to as Arduchip. An FPGA-based camera controller that handles complex and fast-speed camera video signal timing then sends the images to a large off-chip frame buffer.
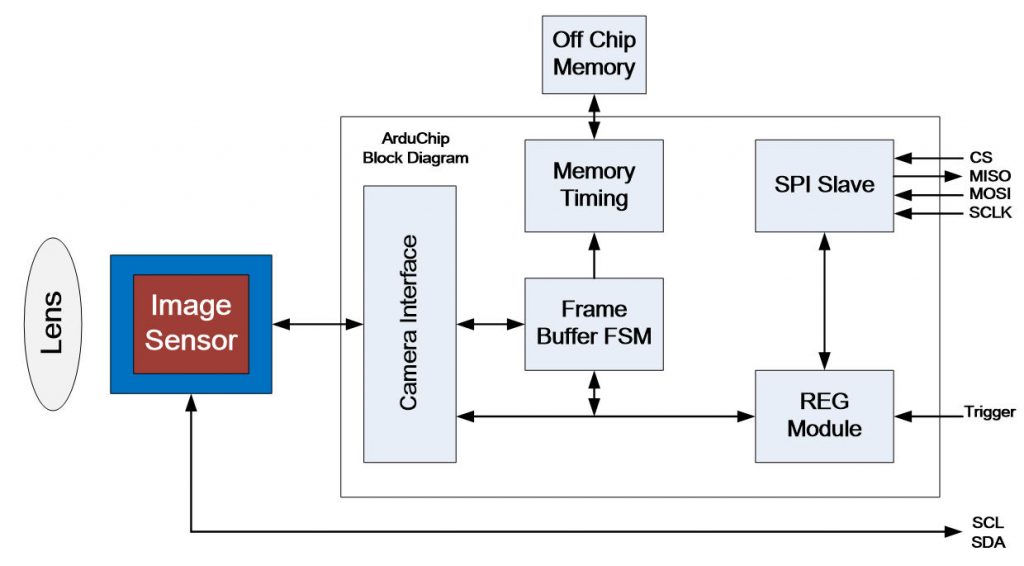
Arduchip directly connects to the image sensor for the whole capturing process to offload the processing tasks from the MCU to our FPGA.
The MUC only needs to send a capture command and read the images out in pretty slow byte-by-byte order whenever it has time to do it, and the image will not be lost since it is held still in the frame buffer until explicitly flushed.
This architecture tackles the issue of missing a dedicated camera interface with uniformed hardware and software structures.
Choose the right image sensor
Arducam SPI camera uses SoC sensor – OV2640 for example – with on-chip JPEG encoder to reduce the image size. It not only reduces the image transfer time but also captures more images within the capacity of the frame buffer.
The Arducam SPI camera uses a System on Chip sensor – such as the OV2640 – with an on-chip JPEG encoder to compress the image. This also means that the image transfer will be faster, and the frame buffer can hold more images within its capacity.
For instance, a 2MP (1600×1200) JPEG image is around 150KByte, and the frame rate of the sensor is 15fps. This means the 8MByte frame buffer can hold up to 3.6 seconds of video or 54 still images.
Lowering the resolution further to QVGA (320×240) at 3KByte per image and 30 fps, the capacity is up to 91 seconds of video clip or 2730 still images.
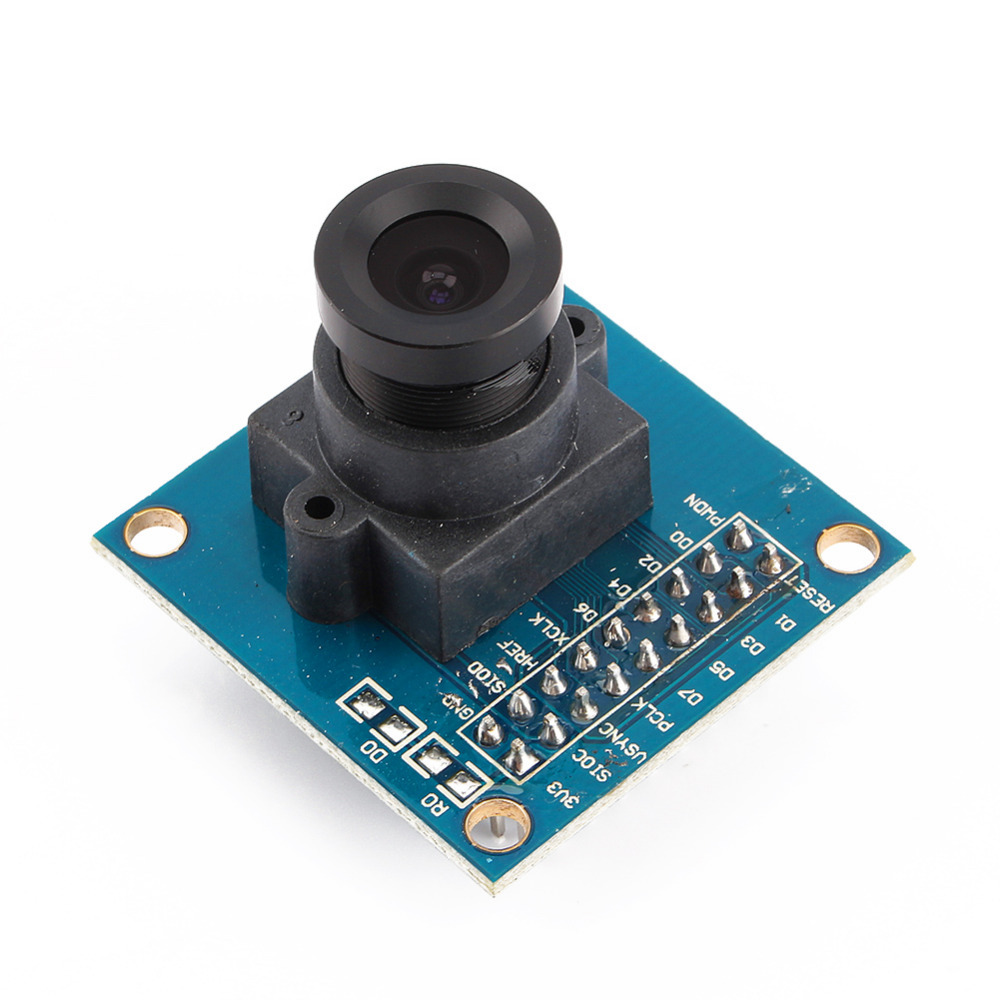
OV2640 vs OV7670
You might also wonder why several camera modules (such as the Serial camera and OV7670 FIFO Camera) can be used on Arduino. The truth is, we don’t think they are Arduino-friendly modules at all.
Firstly, the UART port.
The serial camera is based on UART, on which the maximum baud rate is 912.6Kbps – less than a quarter of 4Mbps SPI. Therefore, the supported resolution is always less than 2MP. Also, UART is not a bus-oriented communication interface and multiple devices are not supported.
Secondly, the image resolution.
The OV7670 FIFO camera uses a VGA (640×480) sensor from Omnivision and AL422B FIFO as a frame buffer, with a total buffer size of 3Mbits (384KBytes). However, 640×480 RGB565 or YUV422 image data occupies 600KBytes memory, and the AL422B is insufficient for holding a VGA resolution data at all. It only supports QVGA 320×240 format images.
And finally, the GPIO usage and the camera driver..
the AL422B FIFO output interface consumes over 10 GPIOs in Arduino, which is not efficient for GPIO usage. From the camera driver’s perspective, you have to use bit-banging style coding to read a single byte from the FIFO, which is both time-consuming and inefficient.
Application with Arducam SPI Camera Module
Arducam’s Arduino cameras are designed for regular less powerful Arduino boards and are mainly for capturing high-resolution still images or a few seconds short movie clips.
So it is suitable for:
- Battery-powered IoT applications that require taking a still image then store it on an SD card or send the image over wifi and upload it to the cloud (like Twitter or Amazon AWS server) for future image processing.
- Battery-powered applications like cube satellite (Cubesat), you can power off the Arducam completely using a MOSFET to cut off the camera power pin to reduce the power consumption to ZERO.
- With multiple camera applications like panoramic photography, you can connect more than 4 Arducams on the same bus and take images at the same time, then poll from each camera to retrieve the image data one by one.
- Tiny Machine Learning (TinyML) with Tensorflow light liked explained in this official Arduino tutorial: Person Detection with TensorFlow and Arduino.
It is not suitable for:
- video streaming,
- surveillance or
- recording,
Because the SPI interface throughput is not enough for MJPEG video stream.
Customized Project
Arducam also helps commercial users create customized SPI camera modules based on customer designated image sensors. For low light sensitivity applications like astronomical imaging (Astrophotography), IMX224/IMX225 sensor is for color, and AR0130 is for monochrome. These are examples of our design winning customized projects.


