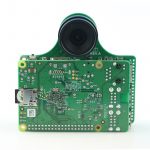
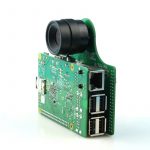
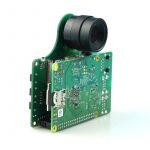
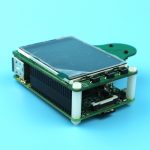
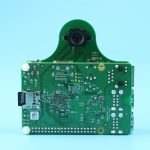
Recently ArduCAM team designed a simple-point-and-shoot digital camera for Raspberry Pi B+ board, it integrates both LCD touch screen and 5MP Raspberry Pi camera board into a single shield. It is well mated with Raspberry Pi B+ board, combined the WIFI dongle user can optionally transfer the captured photos to anywhere else. The RaspCAM features changeable lens options, user can replace the lens with fisheye or telescope lens according to their applications.
Feature
- Well mate with Raspberry Pi B+ board
- 2.8/ 3.2 inch TFT LCD with touch screen
- 5MP CMOS camera module
- M12x0.5 or CS mount lens and lens holder
- Support kinds of lens options
- Opensource Raspberry Camera software
Hardware Setup
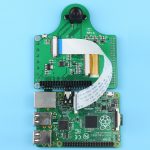
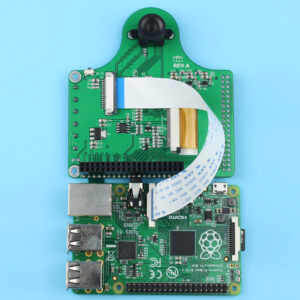
Hardware setup is quite simple, it just needs two steps as follows.Connect the Camera Interface to CSI Connector Using 15Pin FPC flex cable to connect the camera interface on the RaspCAM board and the CSI connector on the Raspberry Pi B+ board.
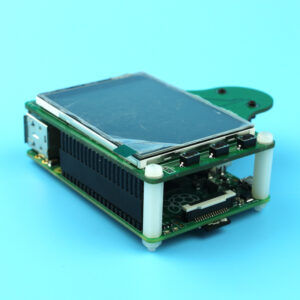
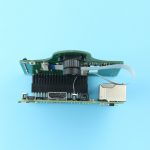
Connect the RaspCAM and Raspberry Pi B+ board Connect the 40pin connector on the RaspCAM board to the pin header on the Raspberry Pi B+ board. Using the plastic standoff spacer between two boards, then fasten the screws.
Software Packge Setup
Before install the software package it is much better to setup a Pi SSH connection, it can be accessed from you host PC whenever you need to control your Pi remotely. Because the frame buffer device will be redirected to 2.8 inch LCD screen and will no longer be displayed on HDMI port.
Make sure if the camera works with current Raspbian distribution before install the RaspCAM software. By connecting the 15pin FPC cable directly to the Raspberry Pi B+ board CSI interface without connect the shield to the 40 pin header. Run the command line program raspistill to check out if the camera works and fine tune the lens focus on your LCD monitor with HDMI connections.
| raspistill -t -1 |
Adafruit team has done a great job on 2.8 inch Pi TFT screen driver and installation guide, please follow the software package installation guide from Adafruit here.
The Adafruit provide a easy install script, by running the script:
| sudo ./pitft.sh -t 28r -r |
It will install the “2.8 Resistive” type of PiTFT into the current install.
Type ‘y’ whenever the script ask you if display the console on the TFT LCD and use GPIO#23 as ON/OFF button.
| Would you like the console to appear on the PiTFT display? [y/n] y Would you like GPIO #23 to act as a on/off button? [y/n] y |
Reboot the Pi when installation is done. Now you can see the console when booting the Pi.
Install RaspCAM software
First, install the Python library for the Raspberry Pi camera:
| sudo apt-get install python-pipsudo pip install picamera==0.8 |
(It’s important to use version 0.8 with this, not the shiny new 1.0. The latter is still a bit unstable with some features we’re using. We’re revise this with a newer release once the situation changes.)
Then retrieve our Python camera application:
| wget https://github.com/adafruit/adafruit-pi-cam/archive/master.zip unzip master.zip |
Finally, give it a try. The software must be run as root (using the sudo command) in order to access the TFT display:
| cd adafruit-pi-cam-master sudo python cam.py |
If all goes well, after a few seconds’ initialization you should see a live viewfinder preview on the screen, as well as two on screen buttons.
If this doesn’t happen, an error message should give some sort of trouble shooting guidance; missing library or driver, etc. This is why we recommend working through the TFT tutorial first.
There’s still some work to be done if we want to use Dropbox, so quit the camera program for the time being…tap the gear icon (settings), the left arrow and then the confirmation button. You’ll be back at the command line now.
Standalone mode
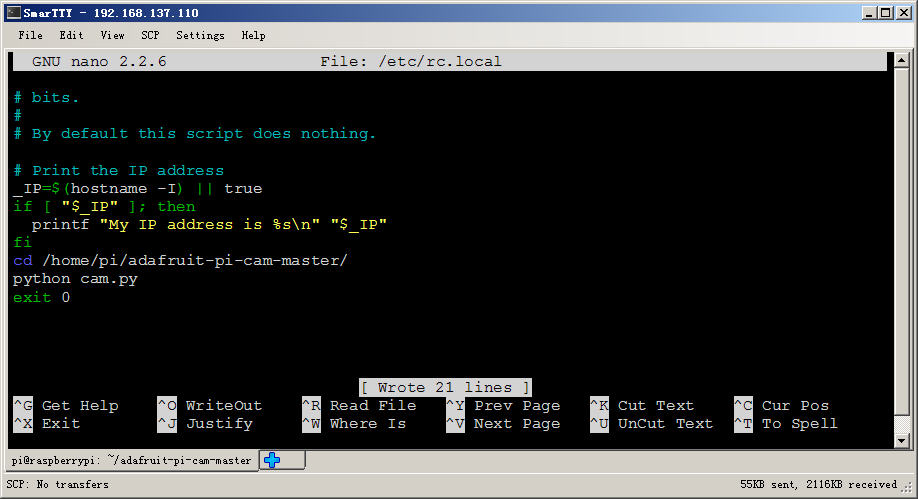
If you’d like to have the Pi in ‘standalone’ camera mode, start by turn on the console output to the PiTFT (see the PiTFT tutorial for this) and also turn on the power on/off button extra on one of the button pads so you can easily and safely turn the Pi off without logging in or connecting a keyboard.
Once you’ve got that working, have the Pi boot straight into the camera software by editing /etc/rc.local and adding the following lines before exit 0
Next time you reboot you should see the text console and then it will start the picam software. To shutdown, use the button you assigned to the power switch module
Using the Camera
You briefly saw the camera interface during testing. We can explain in more detail now how it works and what options are available.
Upon start up, the camera program presents a live viewfinder and a couple of buttons. The majority of the screen itself functions as the shutter “button” — tap to take a still photo.
At the bottom of the screen are two buttons. The left button (with the gear icon) will take you to various settings. The right button (with the “play” symbol) lets you review previously-taken photos (if no photos have been taken yet, the camera will let you know it’s “empty”).
The Settings menu provides access to camera settings. This is not an exhaustive list of every feature possible with the Raspberry Pi camera, just a few essentials to get you started.
The left/right arrow buttons at the top of the screen select among the settings options:
The Storage screen selects between three different options, each with some pros and cons:
- Photos Folder: images will be saved inside a “Photos” folder in your Raspberry Pi home directory (the folder will be created if it doesn’t exist). They can be easily accessed from other programs on the Pi, but this partition isn’t easily accessed when inserting the SD card in other computers.
- Boot Partition: images will be saved in the folder“/home/pi/Photos” on the boot partition. When the SD card is inserted in another computer, it mimics a card from a digital camera and may import photos automatically, depending on system settings. The downside is that space in the boot partition is very limited; you might only store a dozen or so photos there.
- Dropbo x: as previously discussed,images are saved in the Photos folder as well as uploaded to Dropbox (if WiFi is connected and Dropbox configured).
The Size screen selects from three different image sizes:
- Large (2592×1944, 4: 3 ratio ):this is the largest size (5 megapixels) supported by the Raspberry Pi camera. The actual area captured stretches well beyond what’s shown in the live viewfinder though.
- Medium (1920×1080, 16: 9 ratio ): HD resolution, widescreen, 2 megapixels.
- Small (1440×1080, 4: 3 ratio ):1.5 megapixels.The latter two modes should display the actual full photo boundaries in the live viewfinder mode, but don’t yet(something in the camera library documentation doesn’t correspond to reality). This is a work in progress and will be addressed once its understood.
The Effect screen is where all the fun happens.
There are 16 different artistic effects that can be applied to photos (plus “normal,” no effect). Make your photos look like an oil painting, or a pen sketch,or turn the colors weird! These all operate on the live preview as well.
The ISO setting adjusts the camera’s sensitivity to light.This is a tradeoff…more sensitive settings (higher numbers) work better in low light, but the resulting image may be grainy. ISO has no effect on the live viewfinder, only captured photos.
The last screen is an option to quit thecamera program, returning to the command line. Tap the red button to exit, the arrow buttons for other settings, or the Done button to cancel.
The “Done” button returns to viewfinder mode. All the camera settings will be saved; next time you run the script, all prior settings will be as you left them.


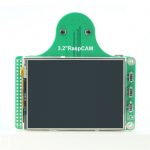

Please, where can we download the driver for the 3.2 inch model of RaspCam? Does the 2.8 inch screen driver also work for the 3.2 inch screen?
Yes, the 3.2″ LCD driver is exactly the same as the 2.8″ LCD.
Hello again,
I would like to know if there is any way someone could please update the camera GUI software to include a time-lapse option where one could easily set things like interval between shots and number of shots… maybe incorporating the push-buttons to increase or decrease the value settings. Also saving each new time-lapse in a new folder so as not to overwrite previous shots. Doesn’t need to actually compile the video… that’s just a waste of time on the pi… only need the stills to download to a laptop later and compile the video. Would also be great if the software could take more advantage of the camera’s abilities… like auto detecting light levels so it can switch the ISO, EV, shutter speed, and put the camera into ‘low-light’ or ‘long exposure’ mode so as the time-lapse is running it can still get usable exposures as the sun goes down. There are so many software packages and scripts out there now for the Raspberry pi camera, but this is the only place I’ve seen a touchscreen menu driven GUI for controlling it…. everything else is CLI driven. Trying to setup a time-lapse in the field is impossible as one needs to manually edit scripts… having to carry a keyboard into the field and edit on the tiny touchscreen is not practical, nor is having to carry a laptop to ssh into the Pi. Is there any way to make this happen?
thank you
Any way to access the camera/pictures via wifi real time?