This tutorial will demonstrate how to use the ArduCAM shield on Arduino UNO board, aim the point and press a snapshot button you will get a BMP picture saved on the SD/TF card.
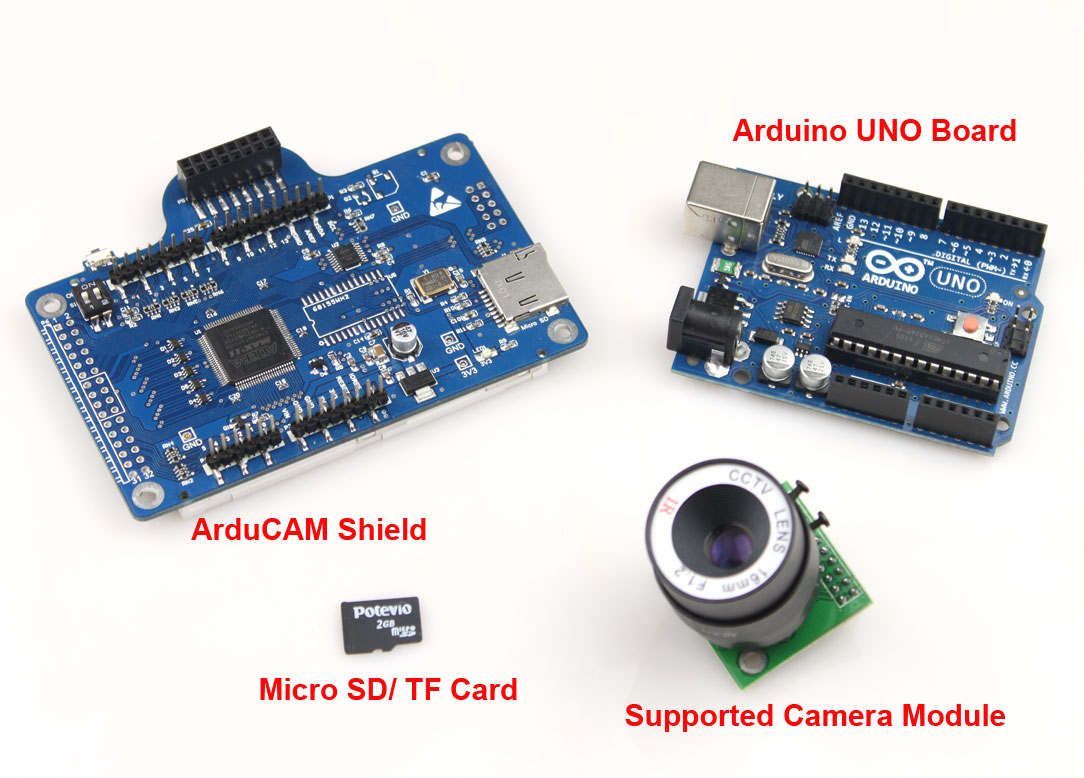
When you get the package you will have the following items:
*1x ArduCAM shield
*1x Arduino UNO compatible board
*1x Supported camera module
You will still need a Micro SD / TF card to complete this tutorial.
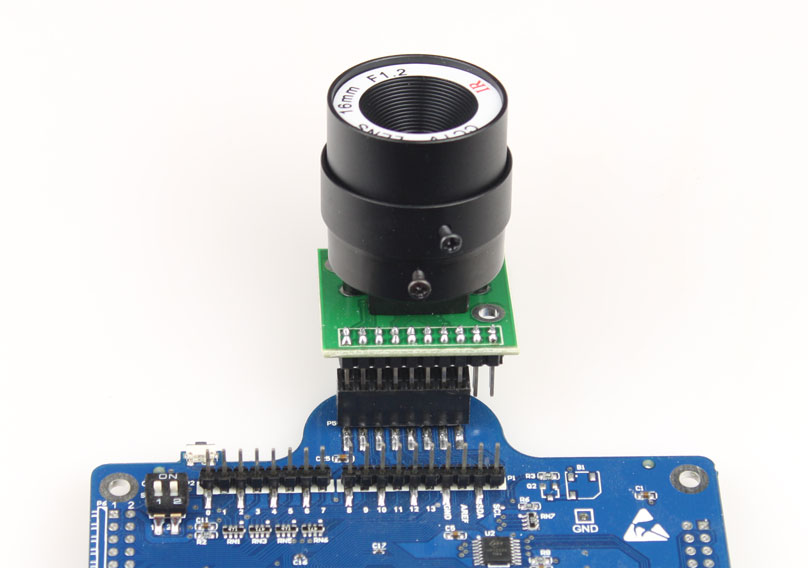
First plug the camera module to the ArduCAM shield, please note that the camera module may have more pins than the socket. So please align the pins on the left and leave the right pins left open like the way on the picture.

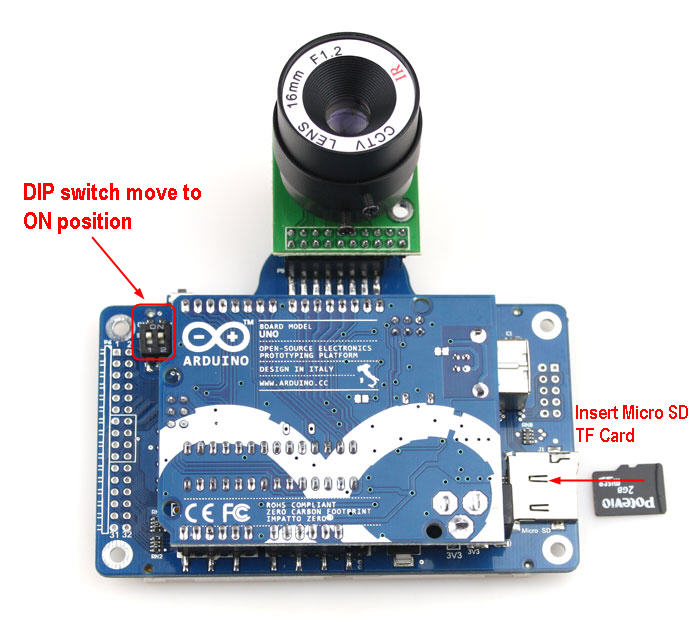
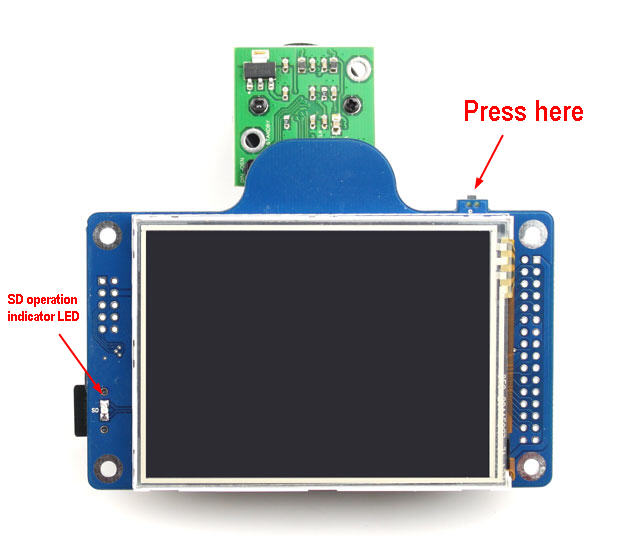
Next step we have to insert the Micro SD/TF card into the card socket. And make sure the 2 way DIP switch on the ArduCAM shield is on the ON position.
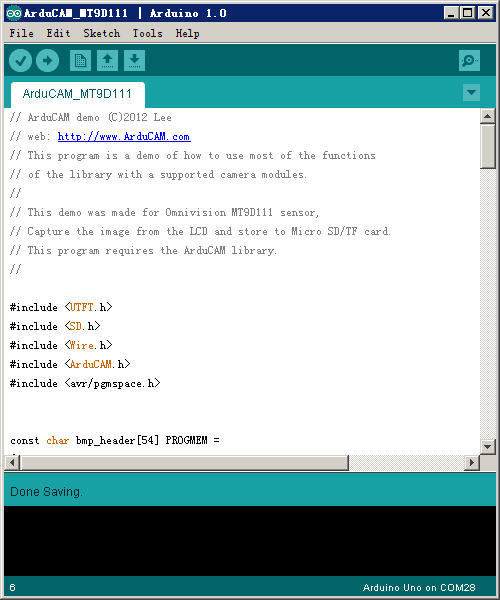
Download the latest ArduCAM firmware library from http://www.arducam.com/download section. Then unzip the library to the Arduino/libraries directory like this way. There are two libraries needed for ArduCAM shield, one is ArduCAM library and the other named UTFT4ArduCAM library which is derived from the UTFT library for the proper operation for the 3.2″ LCD.

Open the example folder unziped from the zip file, you will see several demos for different camera module. Then open the demo according to the camera module you have. Hera use MT9D111 for example. Select the correct COM port for your Arduino UNO board and upload the firmware.
After successfully downloading the firmware, wait for the board to restart. You will see the preview video on the LCD screen, aim the point you want to take a picture and press buttom the LCD screen will freeze and wait for 10 seconds, a 320×240 RGB565 BMP file will be saved.
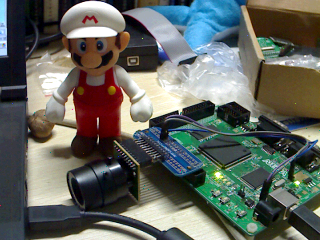
Here is a very nice picture get from MT9D111 camera module.


Naturally I enjoy this post entirely, hope you would likely come up with more info on this.
Thanks for your comment, let me know what kind of information do you want to know.
pour faire marcher la camera : retirer la camera,remettre la camera et appuyer sur reset….un temps de latence important et necessaire avant de faire une photo..
Hey nice writeup! I had a question though, im building a hexapod, and I was wondering about whether I could use a iPhone or Android camera instead?
I don’t quite understand what you mean. You want ot use iPhone or Android camera for what? and how can you use them alone?
Awesome post. I have a final year project to remotely take a picture using a CMOS camera and send MMS to predefined numbers during a security incursion. I would like to know if this arducam can be interfaced with a GSM modem. If so how do I do it??
Yes, you can use uart port in the arduino board to communicate with GSM modem. When you captured a picture, you can send the image data via arduino uart to the GSM modem.