Fancy an upgrade, eh?
The old V1/V2 setup of yours is officially outdated, and the next camera project you’ve been thinking about can finally come to fruition, and you have just found one more reason to start that OpenCV course you were hesitant about, all because of the V3 cameras.
The official Camera Module V3 is made for both RPi first-timers and veterans, while you are trying to keep up with the foundation, these accessories below are ready to elevate whatever you are planning to the highest possible level.
Let’s see what’s on the menu.
1. Camera Enclosures
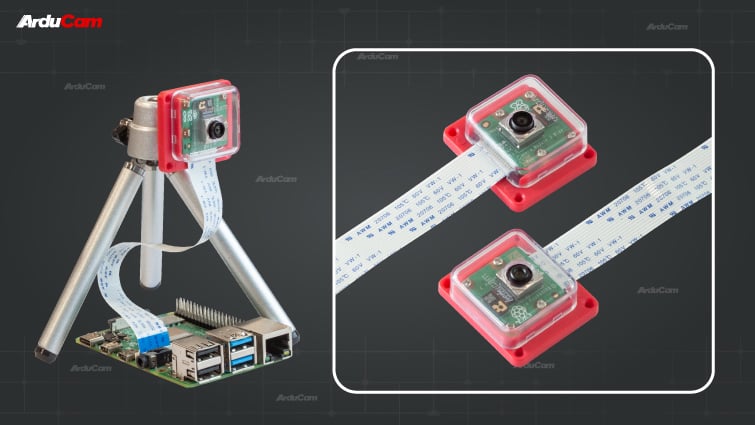
Because we launched two autofocus cameras before the V3 series, and because we designed a slick camera case for easy mounting, also because our two autofocus cameras have matched lens designs as the V3 series, our camera case is entirely compatible with the V3 modules.
There’s a standard mount (1/4″-20) at the back, which means the camera case can make a great pair with any of your existing tripods.
For DIY folks who happen to own 3D printers, there’s also a cool Giraffe-shaped bracket from the community, or if you are savage enough, a gum bottle can also do…
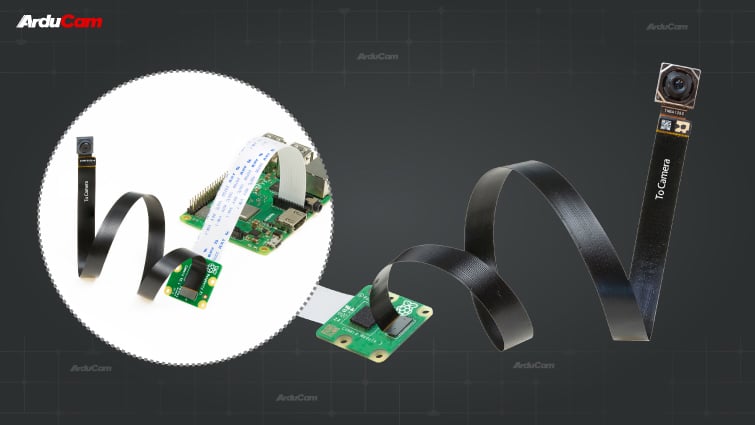
2. Shorter & Longer Flex Cables (Up to 1 Meter)
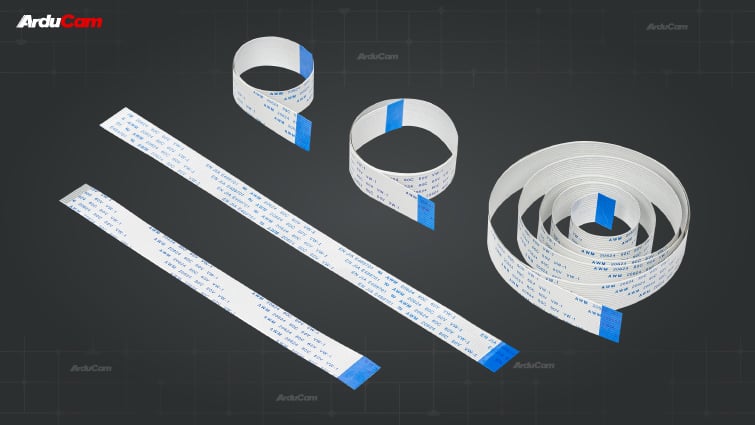
The CSI2 ribbon cable that comes with the camera module 3 is 15cm (6in) long, it’s what the foundation has been offering for all their cameras, which, for most projects, is adequate enough.
But when you are advanced enough to create specific camera setups, and you want to have the FPCs shorter or longer than the default 15 centimeters, here’re your options:
Unfortunately, there’s a limit to it, and we have found that CSI cables exceeding 1 meter will cause occasional interferences and signal losses that eventually lead to corrupted images and videos.
If you want to go beyond 1m and still maintain a stable connection, check the below options.
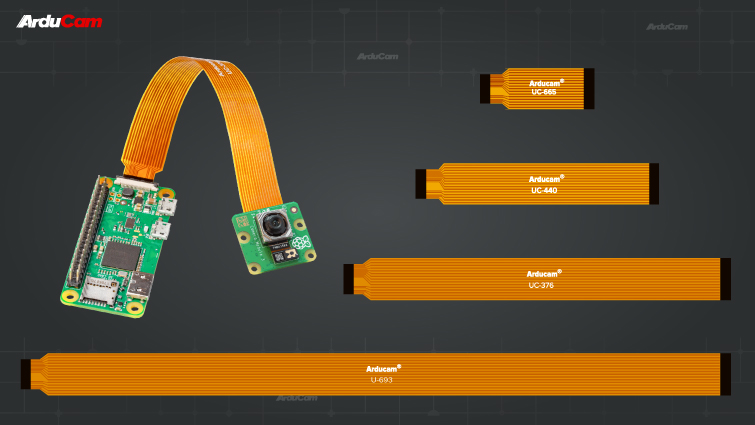
3. 22-to-15-Pin Cables for Pi Zero & Compute Module Series
On the product page of Camera Module 3, under the cable compatibility section, it says:
“All models of Raspberry Pi Zero require a Raspberry Pi Zero camera cable to connect to the Raspberry Pi Camera Module; the standard cable supplied with the camera is not compatible with the smaller Raspberry Pi Zero camera connector.”
Here’s a quick breakdown of the issue:
- The Camera Module 3 board has a 15-pin connector.
- Only regular Pi models (Pi 1/2/3/4) and 15-pin camera connectors.
- By default, the FPC cable you get when you buy a V3 camera has a 15-pin design on both ends.
- Pi zero models (Zero W & Zero 2W) and the dev boards for Compute Module 3/4, on the other hand, feature a more compact design: a 22-pin MIPI CSI-2 connector.
In order to use a V3 camera on a Pi 0 or compute module board, you need to have 22-to-15-pin FPC cables:
4. CSI-to-HDMI Adapter Set (Up to 5 meters)
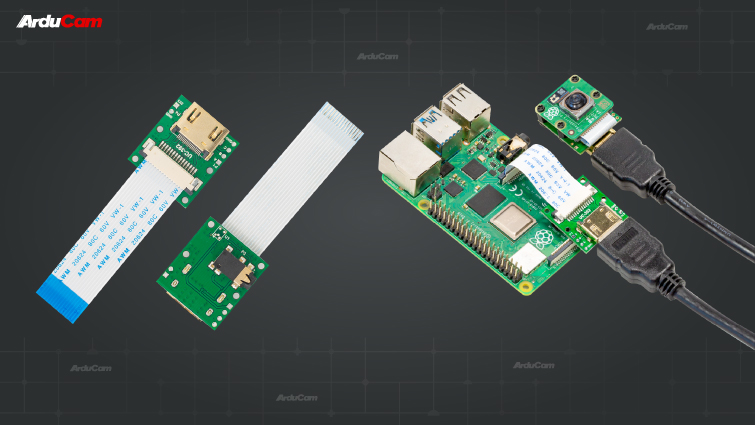
This is a low-cost workaround to keep a fast MIPI connection while extending it to well over its length limits.
By simply passing MIPI signals and data streams through HDMI cables (for stable connection, you need high-quality ones), you can stretch it up to 10 meters between the camera and your Pi.
The adapter set works with all native Pi cameras, including these camera module 3 boards.
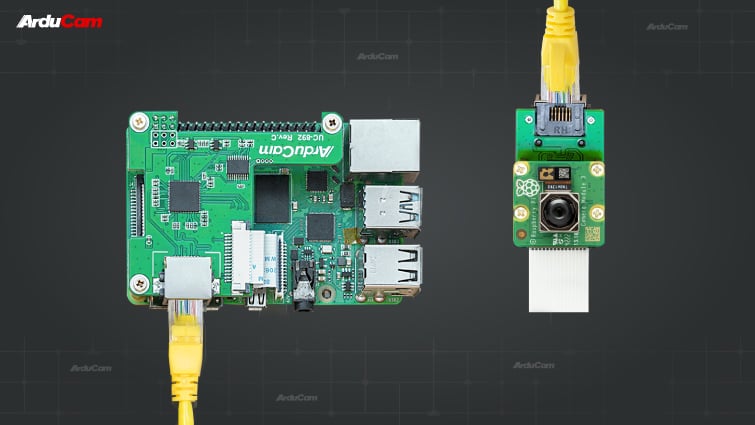
5. CSI-to-LAN Extension Kit (Up to 15 Meters)
If you think the above solution is not impressive enough, here’s another complex yet better alternative.
An adapter & a HAT: one for the camera, one for the Pi, connected with standard ribbon cables.
An RJ45 LAN cable: connects the adapter to the HAT.
The adapter with the camera: encodes the MIPI signal with a special protocol and sends them through the LAN.
The HAT on the Pi: decodes the data streams and converts them back to MIPI signals before they enter the Pi’s camera interface.
Doing so allows you to put the V3 cameras as far as 15 meters from your Pi.
6. Pan Tilt Bracket
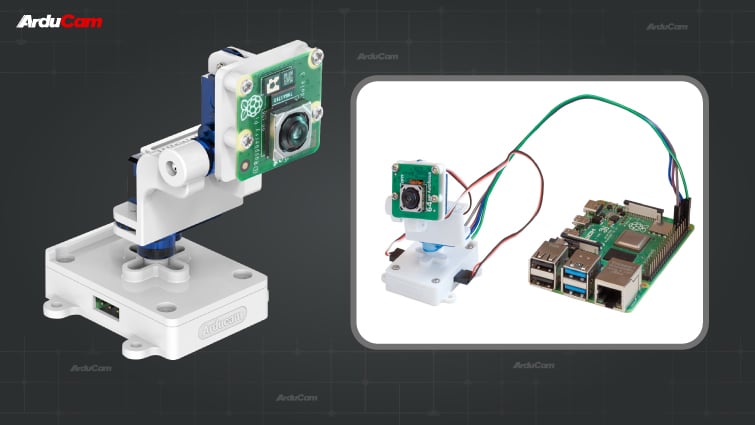
For larger FoVs, V3 Wide or NoIR Wide seems to be the only two options, 102-degree (Horizontal) is not super wide but may still get the work done.
If you aim for maximum single-camera coverage and flexibility, here’s a superior approach: a V3 Pi camera that adopts panning and tilting from traditional PTZ cameras.
The mini PT bracket we created does exactly that.
7. Quad-Camera Multiplexer & Synchronizer HAT
Only the development boards for RPi Compute Modules provide two camera ports, for any other Pi model (including Pi Zeros), you only have one camera (MIPI CSI-2) connector to play with.
Instead of purchasing the CM4 and carrier board combo, there are two ways for you to hack the CSI-2 connector to interface with multiple camera modules.
Multiplexer HAT
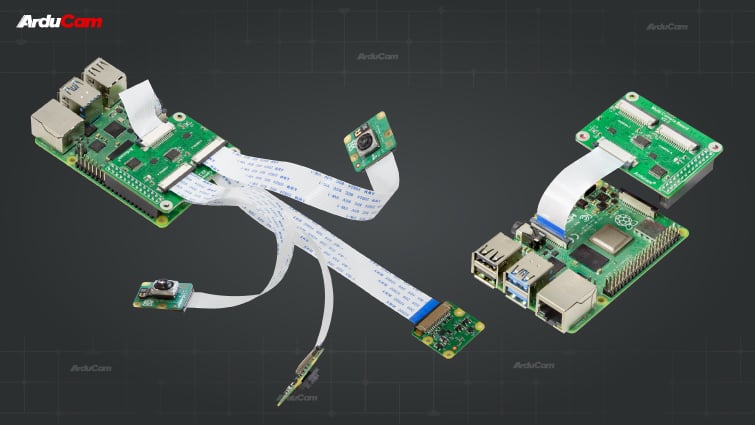
This allows your Pi to control 1-4 cameras to capture in a sequence (one after another), and you can easily switch between cameras.
Synchronizer HAT – (Coming soon)
This allows your Pi to have 2-4 cameras to work in frame-level synchronization (all 2/3/4 channels capturing at the same time), great for stereo vision and applications that demand multiple cameras.
8. CSI-to-USB Converter
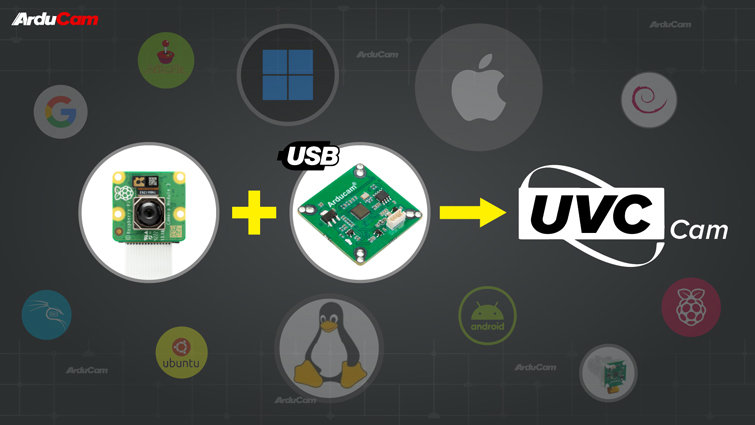
Think about all the potential projects to make if you can just grab any camera module 3, hook it up with a converter board, and turn the camera into a UVC-compliant USB device for hardware that is way more powerful than Pi or boards that does not feature CSI-2 camera interfaces.
It’ll also make it convenient to tinker with the V3 cameras on operating systems other than Raspberry Pi OS and certain Video4Linux-compatible software applications.
9. Lens Extension Cables
Have you seen how the IMX708 sensor and lens are connected to the carrier board?
What if we say you can minify the V3 series?
Here’s what we mean by that: you can just remove the IMX708 module from the V3 camera, snap it on another extension cable, connect the cable to the carrier board, and it still works like a charm!
A Camera Module 3 that’s only 1/4 of its original size will give you the freedom of fitting it into many small spaces, making it more discreet for security/surveillance-based applications.
Footnote
- Images by John Lee.

