Overview This Tutorial is a demo of how to use ArduCAM Mini 2MP/5MP camera module on ArduCAM ESP8266 UNO.
This demo needs: ArduCAM ESP8266 UNO Board(x1), ArduCAM Mini 2MP camera module(x1).
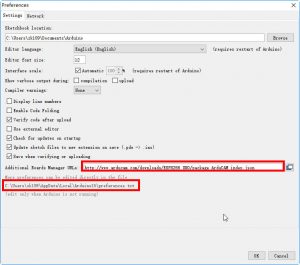
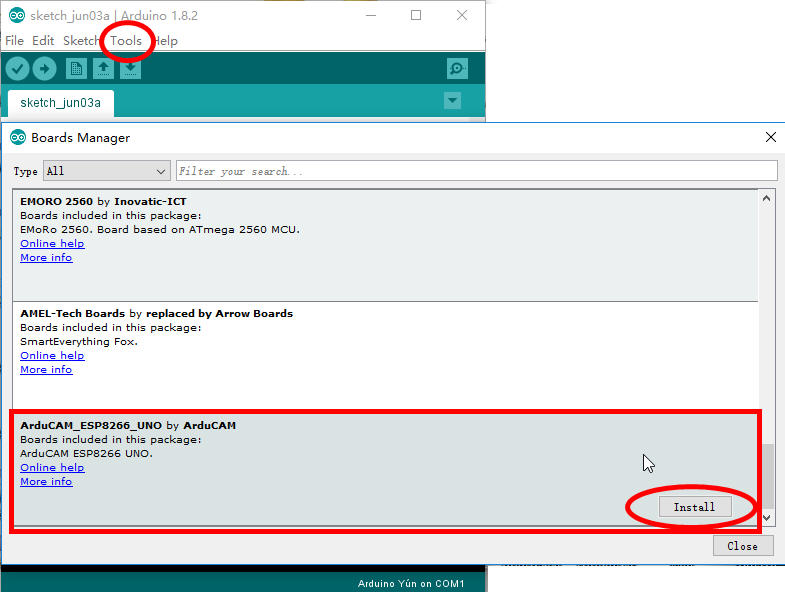
Getting Started ESP8266 with Arduino IDE 1.Installing with Boards Manager Install Arduino 1.6.8 from the Arduino website.Starting Arduino and open Preferences window and entering the following link into Additional Board Manager URLs field. You can add multiple URLs, separating them with commas: http://www.arducam.com/downloads/ESP8266_UNO/package_ArduCAM_index.json
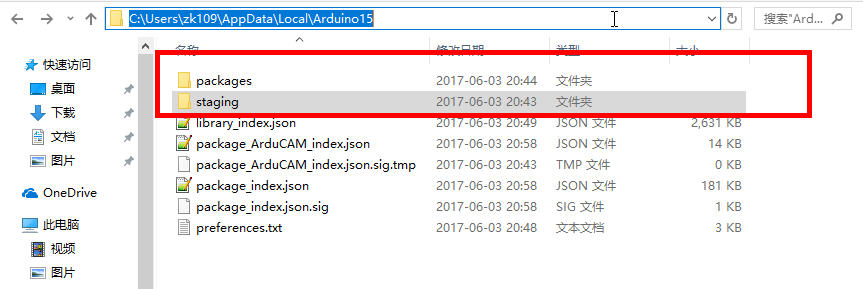
Note that the installed package source file is located in the C:\Users\Your computer name\AppData\Local\Arduino15\ folder,here is C:\Users\zk109\AppData\Local\Arduino15\ for example.
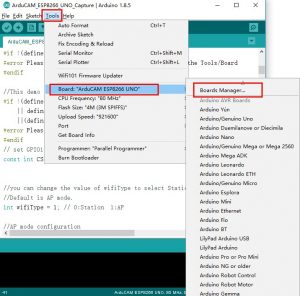
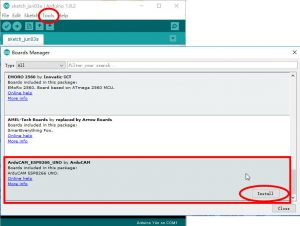
Open Boards Manager from Tools ->Board menu and install ArduCAM_ESP8266_UNO addon package.
Note if you download failed, you need to delete the C:\Users\Your computer name\AppData\Local\Arduino15\ folder, and then restart the Arduino IDE, repeat the above operation.
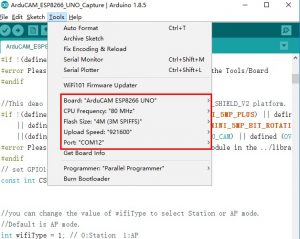
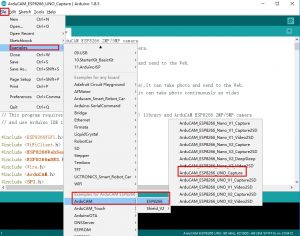
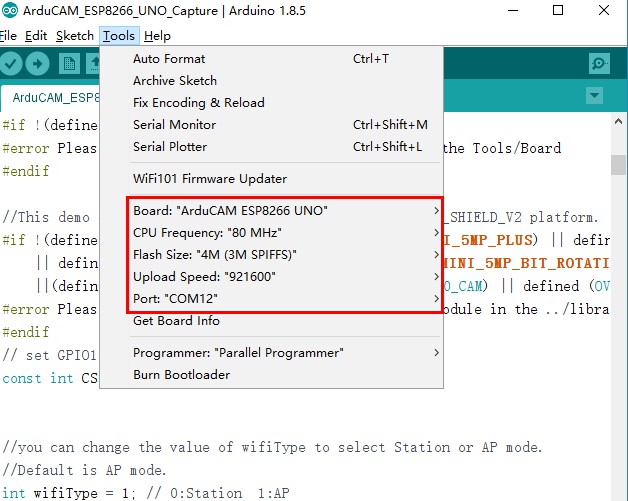
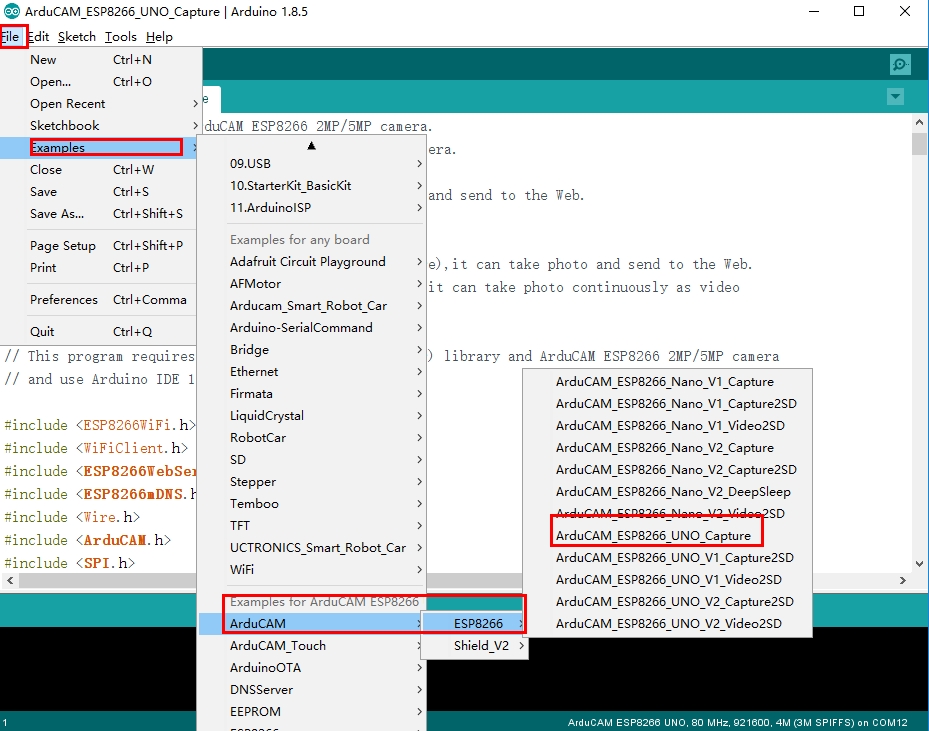
2.Using Arduino IDE After installation of ArduCAM ESP8266 UNO board add-on package, you can select this board from the Tool->Board menu. And there several ready to use examples from the File->Examples->ArduCAM.You can use these examples directly or as a starting point to develop your own code. Select ArduCAM_ESP8266_UNO board from Tools->Board menu.
Select the example from File->Examples->ArduCAM->ESP8266->ArduCAM_ESP8266_UNO_Capture
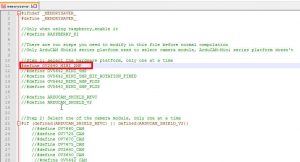
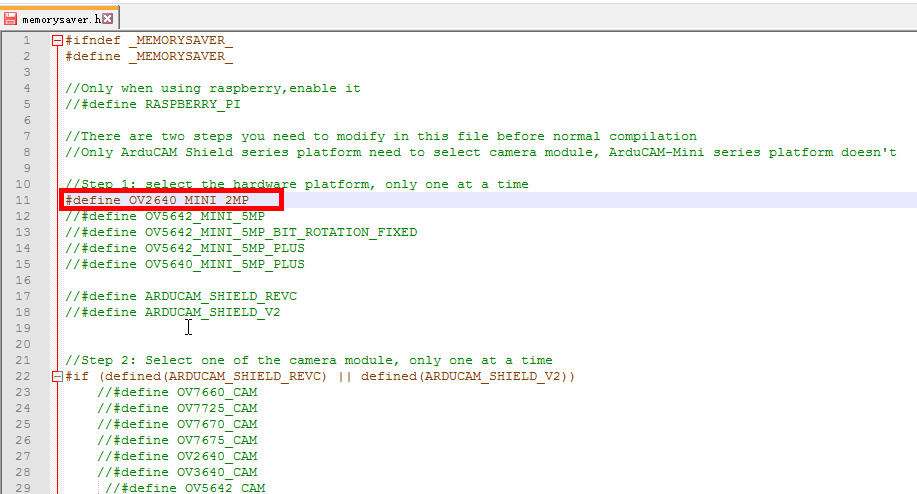
Configure the camera setting You need to modify the memorysaver.h file in order to enable OV2640_MINI_2MP or OV5642_MINI_5MP_PLUS or OV5640_MINI_5MP_PLUS camera modules. Only one camera can be enabled at a time.The memorysaver.h file is located at C:\Users\Your computer name\AppData\Local\Arduino15\packages\ ArduCAM_ESP8266_UNO\hardware\ArduCAM_ESP8266_UNO\ 2.2.2\libraries\ArduCAM.
3.There are 5 examples for both ArduCAM Mini 2MPand ArduCAM Mini 5MP camera modules. (ArduCAM ESP8266 V1 has been discontinued ).
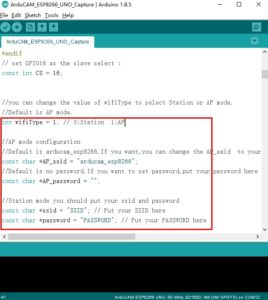
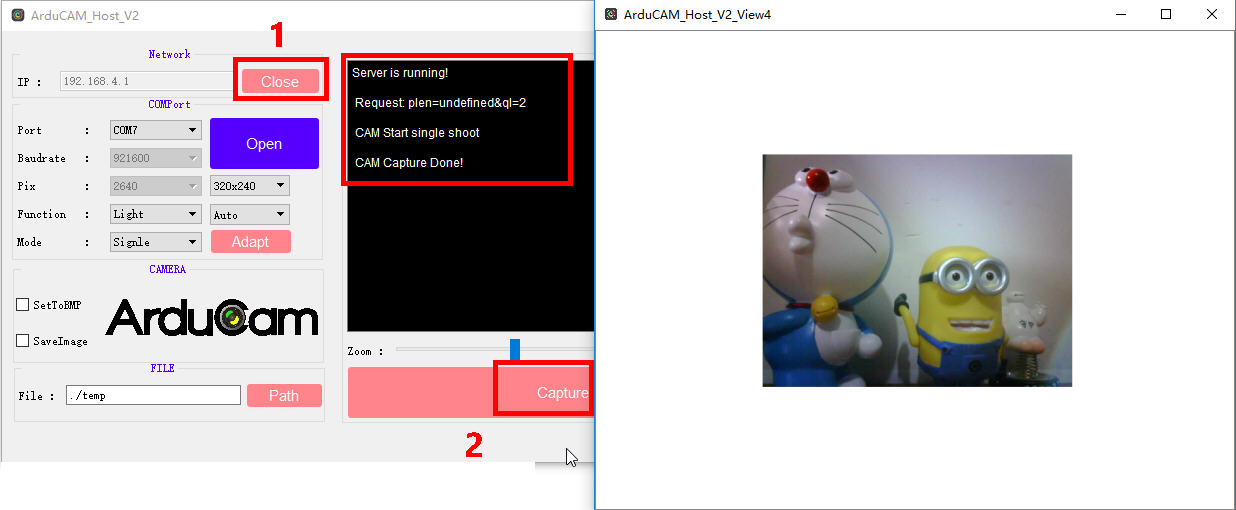
ArduCAM_ESP8266_Capture:this example uses HTTP protocol to capture still or video over home wifi network from ArduCAM Mini 2MP/5MP and display on the web browser. You can change the value of wifiType to select Station or AP mode. If you use Station mode the ssid and password should be modifies before uploading.
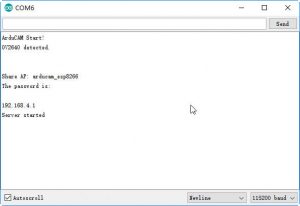
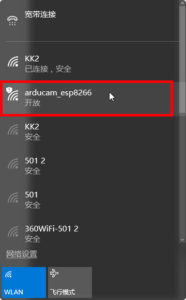
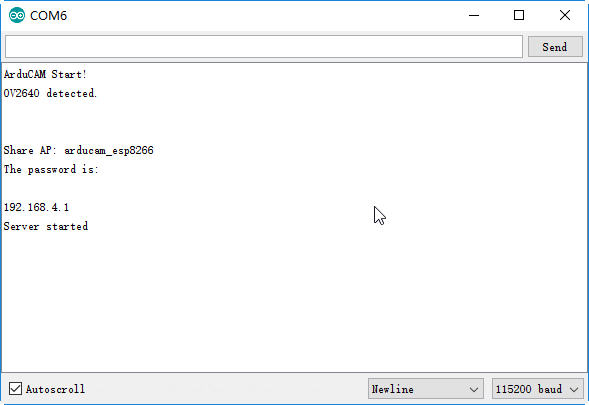
AP mode: After uploading, the board IP address is 192.168.4.1. You can figure out the IP address through the serial monitor.The default serial monitor baudrate setting is 115200bps.
From your PC , go to the WiFi setting page. You should see an Access Point (AP) which the SSID name “arducam_esp8266” on the AP scan result list. Choose the “arducam_esp8266″ AP to connect to it. This AP’s password is “”.
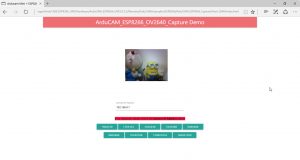
Finally, open the index.html or video.html, input the IP address obtained from the serial monitor then take pictures or videos. The html files are located at C:\Users\Your computer name\AppData\Local\Arduino15\packages\ArduCAM_ESP8266_UNO\hardware\ArduCAM_ESP8266_UNO\ 2.2.2\libraries\ArduCAM\examples\ESP8266\ArduCAM_ESP8266_Capture\html_2640.
ArduCAM_ESP8266_V1_Capture2SD(or ArduCAM_ESP8266_V1_Capture2SD):this example takes time elapse still photos using ArduCAM Mini 2MP/5MP and then stored on the TF/SD card. The LED indicates when the TF/SD card is writing.
ArduCAM_ESP8266_V1_Video2SD(or ArduCAM_ESP8266_V2_Video2SD):this example takes motion JPEG video clips using ArduCAM Mini 2MP/5MP and then stored on the TF/SD card as AVI format,about 4 minutes to complete.
Here are our forum rules to comply with if you want to post a new topic:
Arducam posting rules
The posting rules aim to help you better articulate your questions and be descriptive enough to get help.
Any topic that fails to comply with the posting rules will be unapproved starting from 11/11/2020.
This forum is public. If you prefer a private conversation with Arducam, go to our Contact Center.
If you need help with the Arducam products you’ve purchased, please include the following questions in your post and answer them to help us better understand your needs.
Which seller did you purchase the product(s) from? (Is it Amazon, UCTRONICS, or other Arducam distributors?)
What’s the Model number of the product(s) you’ve purchased? (If you don’t know the model number, show us the link to the product.)
Which Platform are you using the product(s) on? (Is it a Raspberry Pi 3B+/4B, Arduino UNO R3, Jetson Nano B01, or another host?)
Which instruction are you following? (Is it our paper instruction manual, online documentation, or video tutorial? A link will Help.)
Has your product ever worked properly? (Never worked, quit working, or work intermittently)
What problems are you experiencing? (pictures and error codes will help a lot)
What attempts at troubleshooting have you already made?