When it comes to developing a camera-related project on embedded systems like the Raspberry Pi (RPi) or NVIDIA Jetson Nano (NJN), we will take many factors into consideration. To help you better select a camera module, here is a quick start guide from Arducam.
Identify the camera interfaces and choose the right one for you
If you are going to add a camera module to embedded systems like RPi or NJN, you should know how it’ll be connected. There are several interfaces available on those two devices for camera connection, which lead you to different camera families, respectively MIPI, USB, and SPI cameras.
MIPI CSI-2
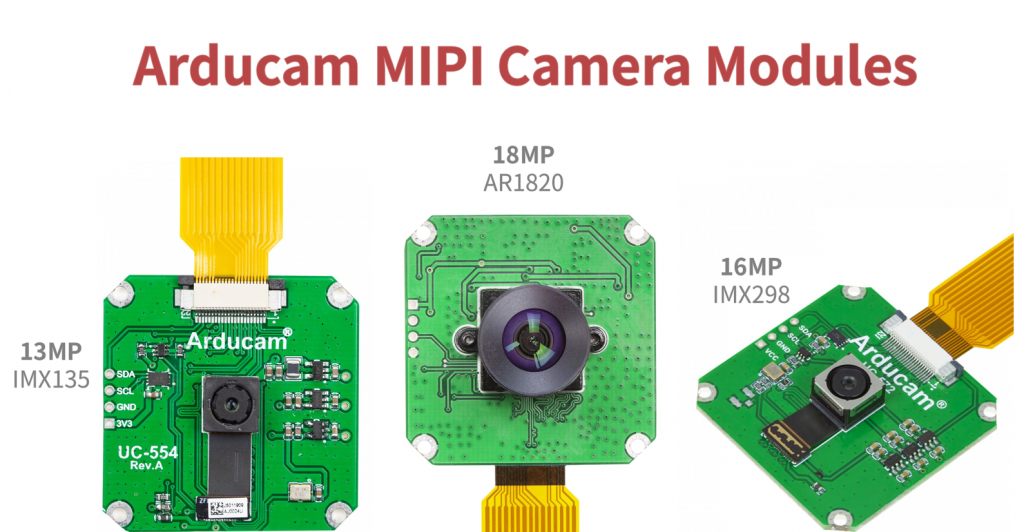
MIPI Alliance is an organization that develops interface specifications, including the MIPI Camera Serial Interface 2 (MIPI CSI-2). MIPI CSI-2 was widely used in mobile industries, and companies like Apple have long adopted this interface in their smartphones. As this camera interface was high-performance, cost-effective, and easy to use, it was quickly expanded beyond the mobile industry with the support of manufacturers.
Therefore, it’s natural to see this interface on embedded systems like the RPi and NJN. On the Raspberry Pi, the MIPI CSI-2 interface takes the form of two physical connectors: 15-pin connector on standard Raspberry Pi models and a 22-pin connector on Pi zero and Compute Module. The Jetson Nano, on the other hand, adopts the 15-pin connector. The 15-pin and 22-pin connectors work with the same camera modules, just with different flex ribbon cables.
The MIPI CSI-2 interface is the default camera interface for Raspberry Pi and Jetson Nano, and the Raspberry Pi camera module V1 and V2 are all based on it. These cameras, along with the third-party upgrades based on them, would serve well to cover most of the basic applications. Even if you want to use these two kinds for multi-camera applications, you can do that with Arducam camera multiplexers and stereo camera HATs.
Powerful and popular as the MIPI CSI-2 Interface seems, it still comes with some limits. The MIPI cameras rely on extra drivers to work, so there is little support of different image sensors if the embedded system manufacturers do not push it forward. Take the Raspberry Pi as an example, we had been stuck with the OV5647 and IMX219 for a long time before the third one – HQ camera – was out.
Arducam has tried hard to change this situation and introduced the Arducam MIPI camera module lineup to fill this gap. With Arducam SDK and examples, you can use various MIPI camera modules on the Raspberry Pi other than the official two.
With Arducam’s latest Pivariety camera series, native ISP tuning on higher-spec sensors is also supported.
However, if the Arducam MIPI camera modules still cannot cover your needs, you might have to consider other interfaces.
USB cameras
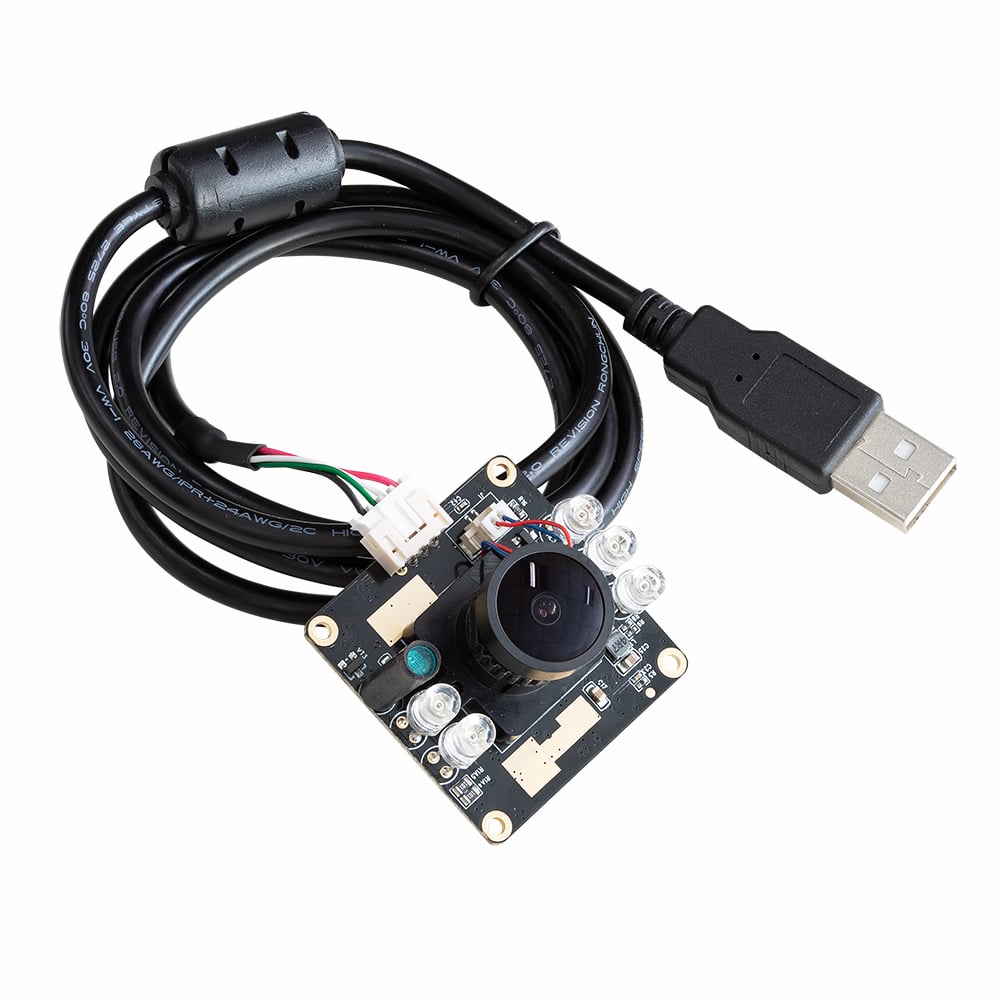
Aside from the dedicated MIPI CSI-2 camera interface, the RPi and NJN also come with multiple USB ports for connecting more devices, including USB cameras. The USB cameras adopt the standards of the USB interface, so they are easily expandable and adapted. What’s more, they could be made driver-free by following the USB device standards.
Those driver-free USB cameras are UVC cameras, and those not are usually developer kits for camera evaluation and development. UVC is short for USB Video Class, and it’s one of the USB device classes. The drivers for UVC cameras to work have already been preinstalled in the operating system, so it’s a plug-and-play experience for them.
The most used UVC cameras are webcams, but there are also other UVC cameras available for embedded uses. Arducam offers several UVC board cameras as an implement for our current embedded MIPI camera modules. These cameras have more case-specific features like Wide Dynamic Range (WDR), low light enhancement and so on.
On the other hand, the Arducam USB camera shield is a general-purpose camera control board designed for both PCs and embedded systems like the Raspberry Pi, Odriod, TI Beaglebone, and similar hardware. It supports almost all parallel interface image sensors and many MIPI camera sensors ranging from 0.3MP to 18MP, including both global and rolling shutter sensors. The camera comes with a comprehensive software SDK library and example source code you need to make it work on Windows and Linux systems.
SPI camera

The SPI camera solution is feasible on the Raspberry Pi and Jetson Nano platform but is less recommended for those two devices. The SPI camera is a general-purpose camera solution that can work with any device that has SPI and I2C connectors. It was mainly designed for the platforms without a dedicated camera interface, such as the Arduino boards. Although you can use it on a Raspberry Pi, the limited SPI rate will become a handicap for the camera application.
Monochrome or color sensors
Another thing to consider is the sensor type. It might not apply to all cameras, but most Arducam global shutter cameras are monochrome and most rolling shutter cameras are color sensors.
Color sensor with rolling shutter
A color sensor is an image sensor with color filters, and the Bayer array filter is the most common one. A color filter passes light with a certain wavelength and blocks the others in a sub-pixel, and the information on the sub-pixels will then be used to generate the color of the pixel.
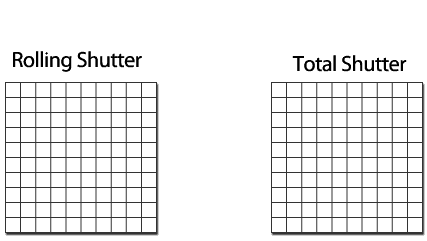
Rolling shutter, on the other hand, refers to a method of capturing images. A rolling shutter does not expose the entire sensor simultaneously, instead, it exposes line by line from top to the bottom.
The good thing about the color sensor with a rolling shutter is that it shows what our human eyes see better. It’s cheaper to build and easy to equip with more pixels. However, it may fail to capture objects that move faster than the speed of exposure.
Monochrome sensor with global shutter
Unlike a rolling shutter camera, a global shutter camera exposes all pixels at the same time. The shutter opens and closes in a short period. Therefore, it can take better pictures of fast-moving objects without blurring the details.
A monochrome sensor captures an image only recording the strength of illumination, regardless of the colors. In this way, it can capture more light – or more specifically, photons – because no light will be blocked by a filter. That’s a good companion for global shutter, because the fast shutter speed and high frame rates on those shutters capture less light during each exposure, and the extra lights passed without the color filter would offset the loss in exposure time.
Conclusion: If you aim at higher frame rates and fast-moving objects, you can go with global shutter monochrome cameras. If you want to capture more details and still photos, you can try a high-resolution rolling shutter color camera.
Fixed or adjustable focus
Unlike human eyes, the cameras cannot switch between objects near the lens and those far away easily. Most times the focus of a camera is set to infinity by default, and you might find it hard to see closer objects, just like the official Raspberry Pi cameras.
If a camera comes with a camera lens, such as an M12 or CS-Mount lens, the focus would be manually adjustable, and you can screw the lens further from the thread to focus on closer objects after it’s focused to infinity.
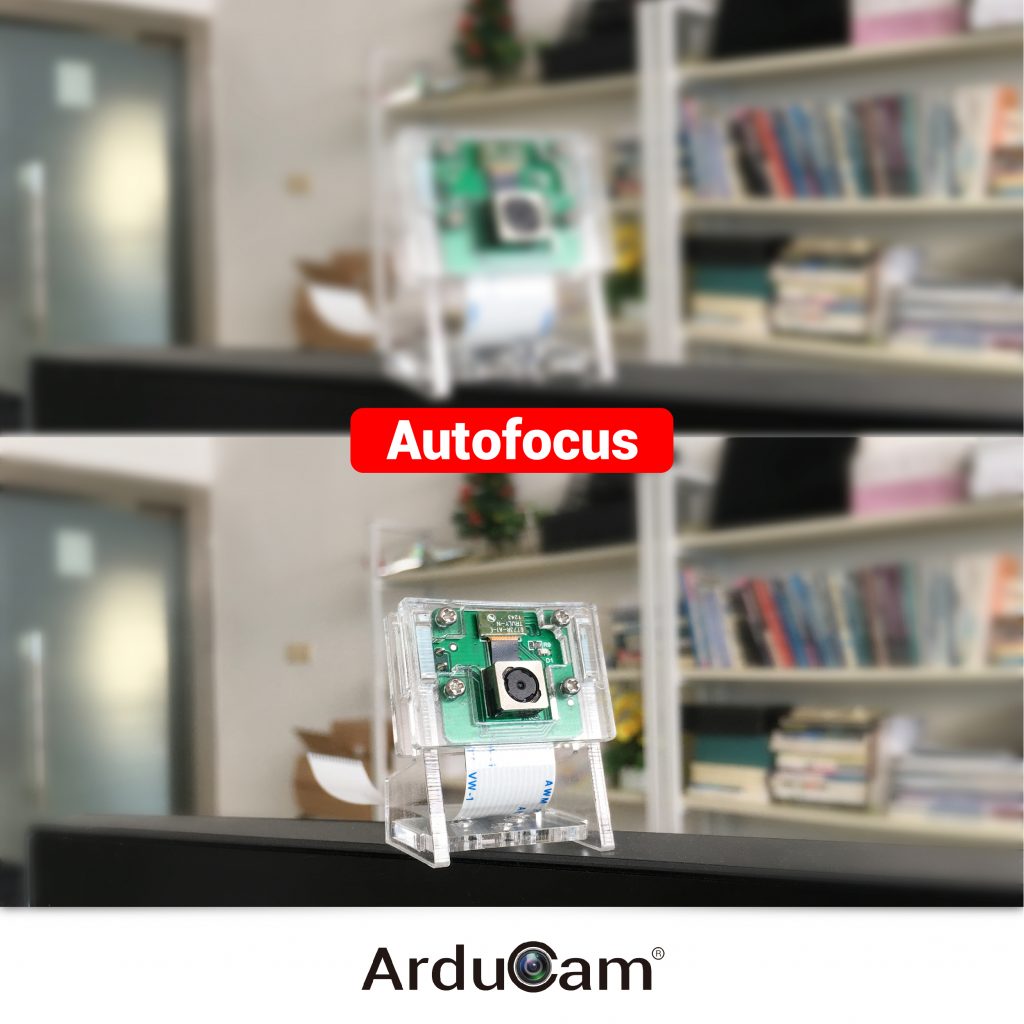
However, if your application required the focus to change from time to time, you would not want to adjust the focus manually each time. The autofocus camera modules come with built-in motors to move the lens, so you can remotely control the focus either by sending commands or use software for autofocus.
How to find the right module for your project
For example, a customer of ours wants to use a camera on Raspberry Pi for day/night surveillance, and he wants to keep the color details at night. At first, he uses a 5MP OV5647 camera, only to find it’s not able to capture enough light for the picture to show anything. He then wants a larger lens to capture more lights and get our CS-Mount lens camera for Raspberry Pi, but the image area is narrower than his expectation and the dark areas are still not identifiable. After knowing his detailed requirements, we have recommended a low-light USB camera module with a wide-angle lens, and he is happy with that.
In conclusion, the key to finding the right module for your project is to know your applications and requirements. Do you need to capture crisp sharp details? How large is the captured area and how far will you be shooting the scene? Does the object move fast like on a convey belt? What is the lighting condition? Will you be using the camera on different platforms?
After figuring out these questions, you can decide between the camera interfaces, colors, Field of View, and focus methods. When all these questions have been answered, we are getting to the right camera.


Hii Lee
Thanks a lot for sharing this awesome info . i personally like the all points about camera you explained . when,how & which to use according to application , types of camera and its connectors thnx for a great post and will follow it .keep it up