Introduction
In this demonstration we will illustrate how to transfer image wireless over Bluetooth with Arduino boards. To complete this demo we need an ArduCAM shield, a OV2640 Camera module, an Arduino UNO board or a Mega2560 R3 board, and a Bluetooth TTL transceiver module.
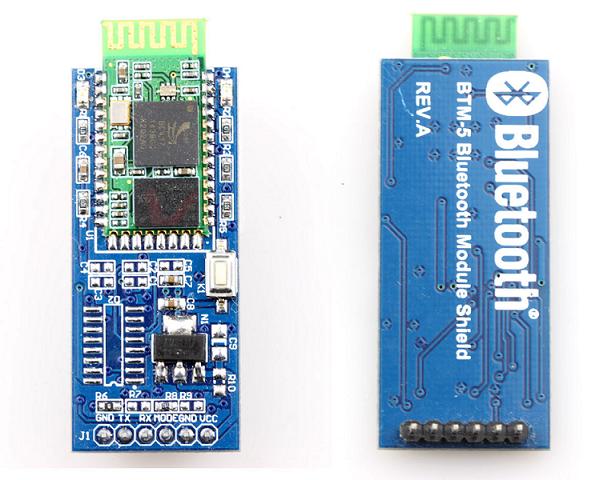
Bluetooth is a kind of short range communication technology with high speed baud and widely used in audio and compressed video applications. BTM-5 Bluetooth module implements a PPP protocol once connected with Bluetooth master, it will be emulated as a serial port. Then we can send and receive data just like though a standard serial port.
Set the BTM-5 Bluetooth module
Before this demo user should to set the BTM-5 as a slave module, set the correct baud rate as 115200bps and paired with Notepad. User guide of BTM-5 module can be found from here.
Do the connection
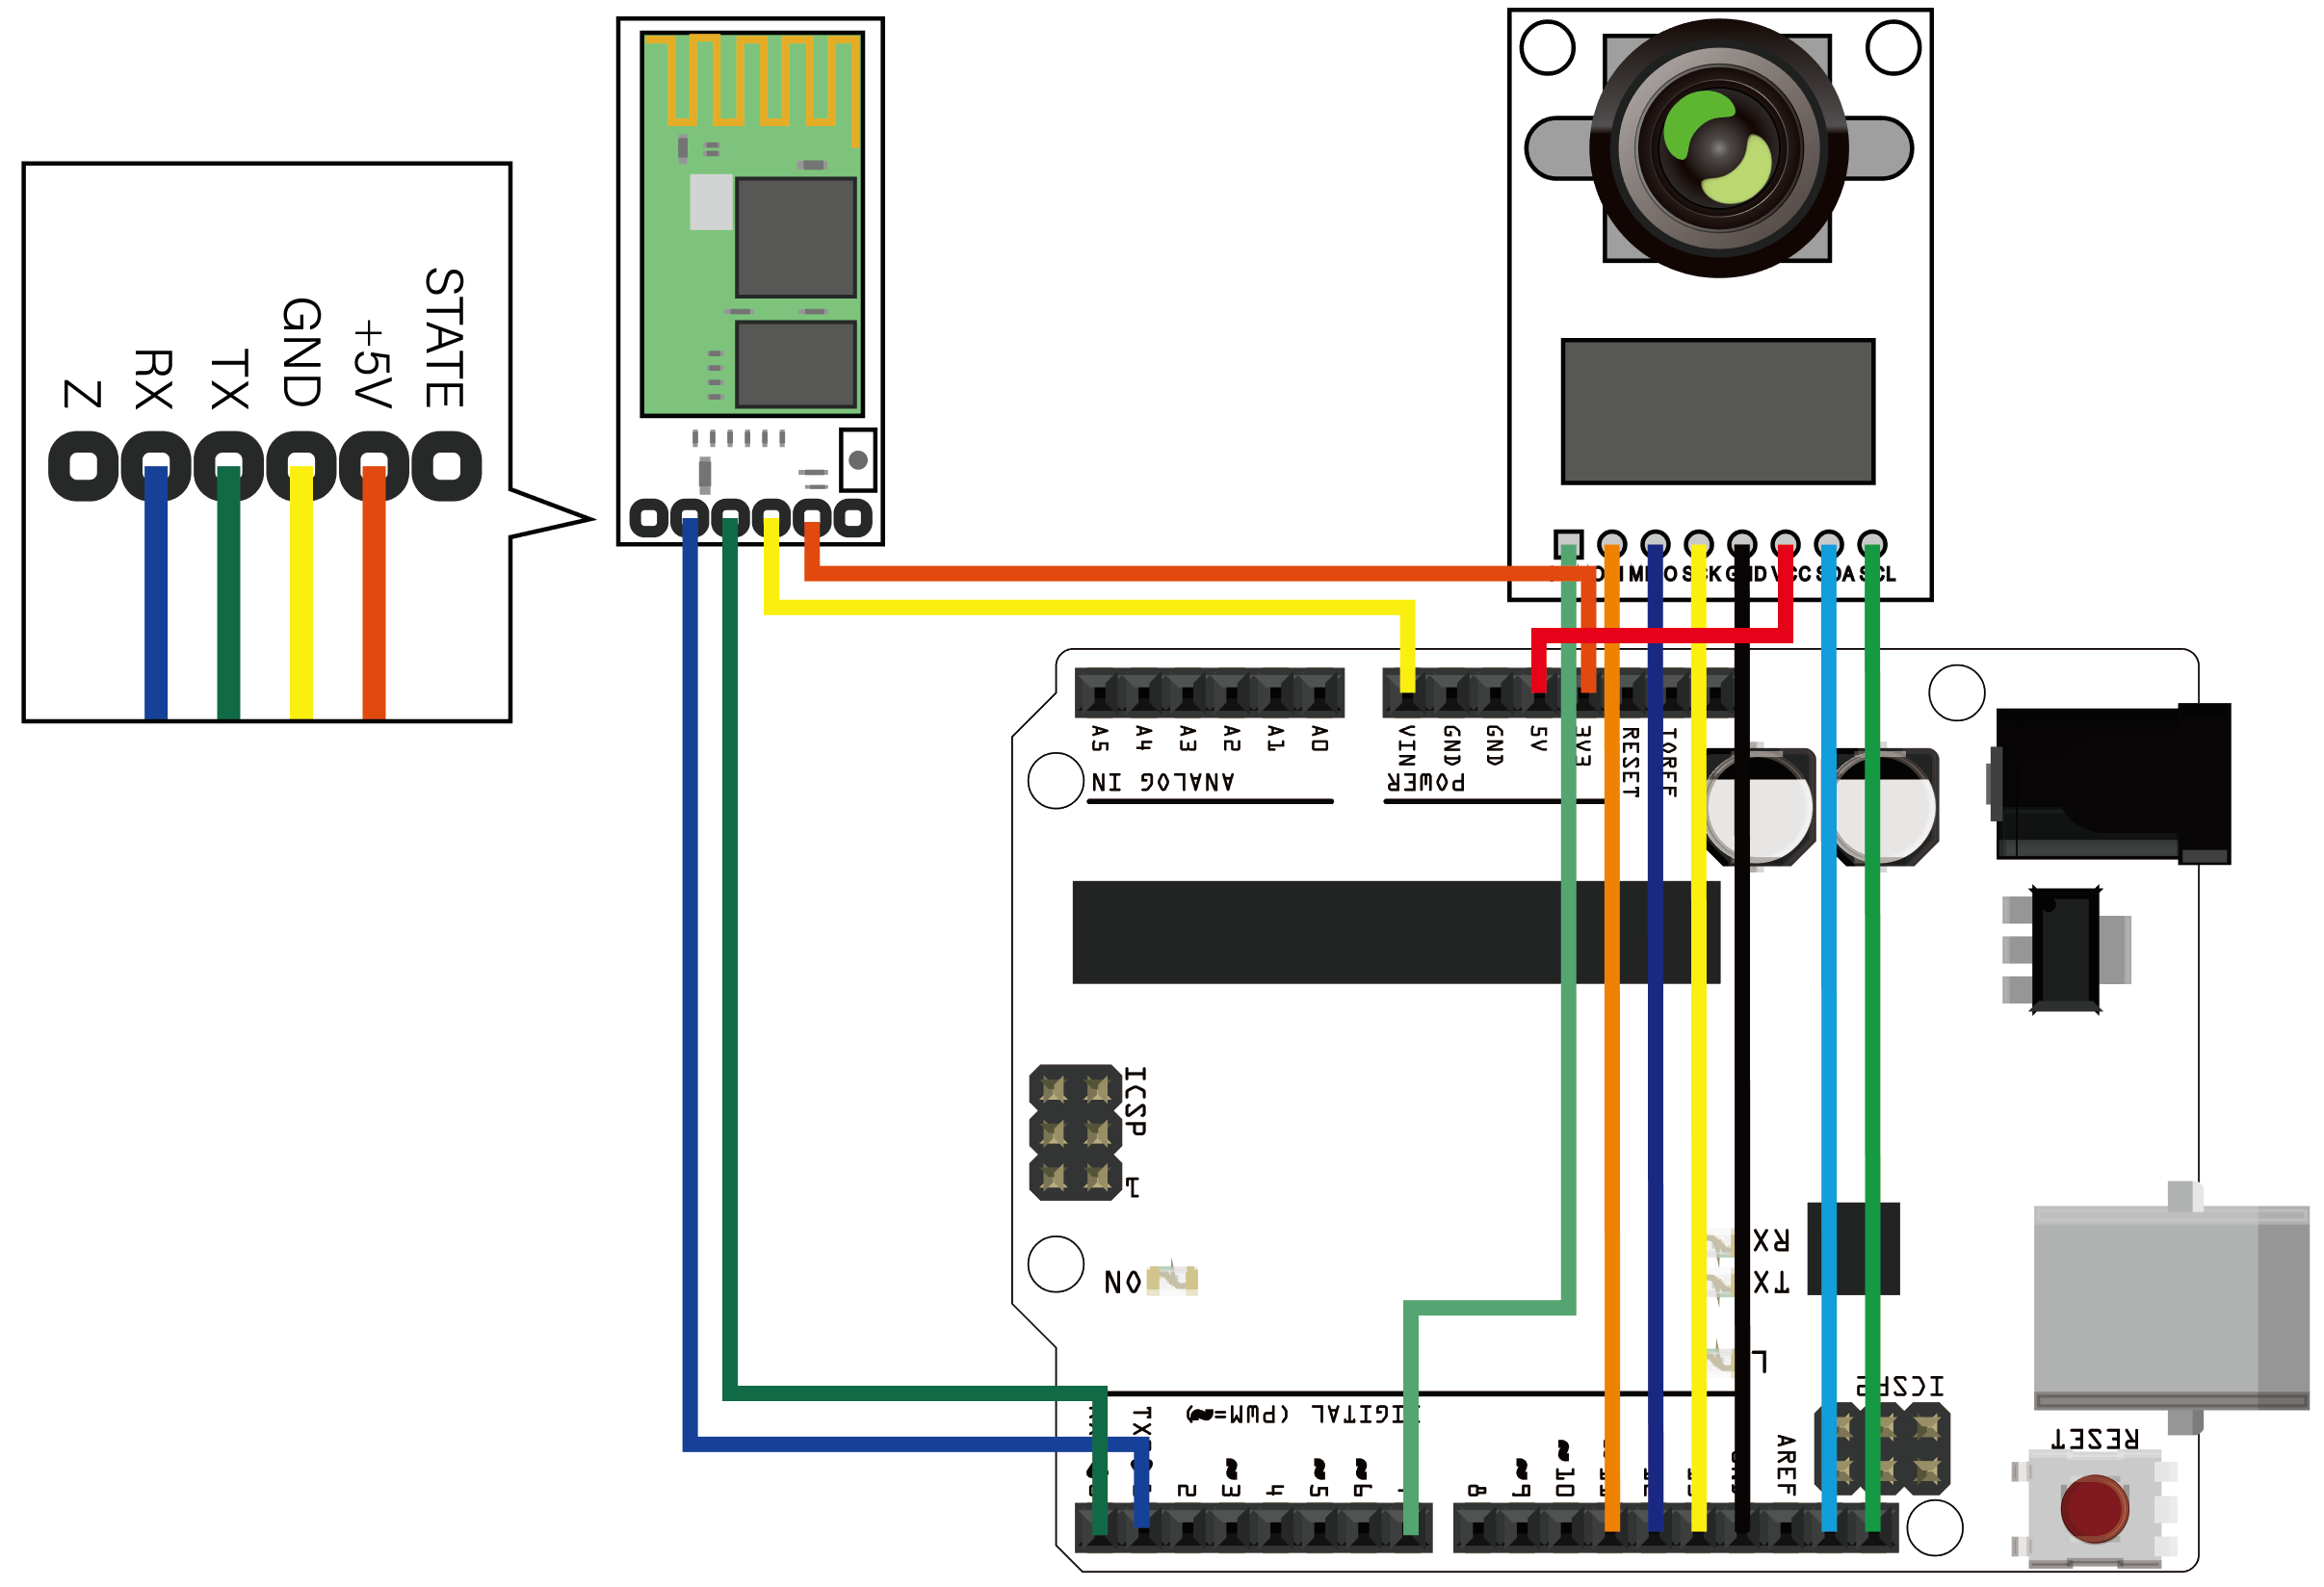
The connection between BTM-5 module and Arduino board lists as follows. The Figure1 show the UNO board typical connection and the Mega 2560 R3 board connection is the same.
Arduino Uno bard has one hardware serial port located in pin D0(RXD) and D1(TXD), So we can connect the BTM-5 module RX and TX pins to the UNO’s D1(TXD) and D0(RXD). Notice: before uploading the sketch to the board, you should remove the BTM-5 module in order to avoid serial port conflict.
Figure1
Load the sketch
In order to transfer a image as quick as we can, we have to use compress image to minimize the baud width. The Table 1 show the time required to transfer image over 115200bps baud rate with different resolution and format.
Table1
| Resolution | Image data size | Time required to transfer with 115.2kbps |
| BMP 320×240 | 150KByte | 13s |
| JPEG 320×240 | 3~6KByte | 0.3~0.5s |
| JPEG 640×480 | 20~30KByte | 1.7~2.6s |
| JPEG 1600×1200 | ~130KByte | ~11s |
OV2640 camera module has embedded JPEG compress engine, so we have to configure the module to output JPEG image.
Arduino Uno board demo sketch download from here.
Arduino Mega 2560 R3 board demo sketch download from here.
Send capture command and receive image data
When all the connection is done, power up the Arduino board and wait few seconds for the green LED is ON which means the pair is successfully. Then open the Arducam Host_V2 .exe choose the right serial port and baud rate. Then click Capture to get image data . ArduCAM_Host_V2.exe software can be downloaded from here.

ArduCAM Host_V2 software receive image data, playback on the dialog box.What’s more, it can save each image data if you choose SaveImage.


Would it be possible to see what arducam is viewing through the smartphone?
Do I need the Arduino connected to the port of the computer? I want to integrate this camera and BT module for an RC car